Disclaimer

This content was created with the help of AI

Wednesday, April 30, 2025

Easy Cream Cheese Chicken Enchiladas Recipe

Looking for a comforting meal that’s perfect for busy weeknights? You’re in the right place! This Easy Cream Cheese Chicken Enchiladas Recipe brings creamy, cheesy goodness together with tender chicken, wrapped in a soft tortilla. 

Whether you’re feeding your family or hosting friends, these enchiladas always hit the spot.


A plate of Easy Cream Cheese Chicken Enchiladas Recipe


Why You’ll Love These Cream Cheese Chicken Enchiladas

If you love easy chicken recipes or crave Mexican-inspired comfort food, this dish is about to become a staple at your dinner table. I remember making these enchiladas after a long day, and the smiles around the table made every step worth it. They’re simple, satisfying, and full of flavor. Plus, the creamy filling is pure comfort on a plate!

  • Quick to prepare – only 15 minutes of prep time!
  • Kid-friendly – little ones love the cheesy, mild flavors.
  • Perfect for leftovers – these enchiladas reheat beautifully.
  • Freezer-friendly – meal prep just got easier.

What Are Cream Cheese Chicken Enchiladas?


A pan full of cream cheese and chicken to show What Are Cream Cheese Chicken Enchiladas?

If you’ve never tried enchiladas with cream cheese before, you’re in for a treat! Think of it as the best of two worlds: creamy chicken filling wrapped in warm tortillas and baked with tangy enchilada sauce and gooey melted cheese. It’s like a hug on a plate.

Enchiladas are a classic Mexican dish made with filled tortillas topped with sauce and cheese. The twist in this recipe comes from the addition of cream cheese, which makes the filling extra rich and satisfying.

Ingredients You’ll Need

The beauty of this recipe is its simplicity. Most ingredients are probably already in your fridge or pantry! Here’s what you’ll need:

  • Cooked chicken (rotisserie or leftover chicken works well)
  • Cream cheese – softened to room temperature
  • Sour cream
  • Shredded cheese (cheddar or a Tex-Mex blend)
  • Enchilada sauce (store-bought or homemade)
  • Flour tortillas (medium size, about 8-inch)
  • Chopped green onions
  • Salt, pepper, and any favorite seasonings

Got leftover chicken or veggies? Toss them in – this recipe is super flexible.

Step-by-Step: How to Make Cream Cheese Chicken Enchiladas

A plate full of chicken enchiladas with all the trimmings to show How to Make Cream Cheese Chicken Enchiladas

Let’s walk through the process. You’ll be surprised how quickly this dinner comes together!

1. Prep the Filling

In a large mixing bowl, combine shredded chicken, softened cream cheese, sour cream, a little of your shredded cheese, chopped green onions, and seasonings. Stir until everything is evenly mixed. The cream cheese should melt together with the chicken, making a creamy, dreamy filling. (Tip: Warm the cream cheese a bit to make mixing easy!)

2. Fill the Tortillas

Spoon the chicken mixture into the center of each tortilla. Don’t overfill – about 1/3 cup per tortilla will do the trick. Roll them up and place seam-side down in your baking dish. It’s a bit like wrapping a present, only tastier.

3. Pour & Sprinkle

Pour enchilada sauce over the rolled tortillas. Sprinkle a generous amount of cheese on top. The more cheese, the better if you ask me!

4. Bake

Bake at 350°F (175°C) for about 25-30 minutes. You want the cheese to be bubbly and golden brown. Your kitchen will smell amazing – be warned, this might bring curious family members into the kitchen!

5. Serve & Enjoy

Let the enchiladas cool for a few minutes, then serve. I love to top mine with extra green onions, a spoonful of salsa, or even a dollop of sour cream. What toppings do you love?

Tips for the Best Chicken Enchiladas

  • Use rotisserie chicken for a big shortcut and tons of flavor.
  • Soften cream cheese before mixing to avoid lumps.
  • Warm tortillas briefly so they’re easier to roll and less likely to tear.
  • If you want to add extra veggies, try corn, bell peppers, or black beans.
  • Spice it up – add jalapenos or a pinch of chili powder for heat!

Make-Ahead and Freezer Instructions

This recipe is a meal prep superstar! Here’s how to make your busy weeknights even easier:

  • Make ahead: Assemble the enchiladas and store, covered, in the fridge up to 24 hours before baking. Perfect for prepping in the morning and baking at dinnertime!
  • Freeze: Place assembled (unbaked) enchiladas in a freezer-safe dish and freeze for up to 3 months. Bake straight from the freezer, just add 10-15 more minutes to the bake time.
  • Leftover magic: Reheat leftovers in the microwave or oven. They taste just as good the next day!

What to Serve with Cream Cheese Chicken Enchiladas

A plate with chicken enchiladas with rice, black beans and corn to show What to Serve with Cream Cheese Chicken Enchiladas?

While these enchiladas are a meal by themselves, sometimes you want a little something on the side. Here are my favorites:

  • Spanish rice or cilantro-lime rice
  • Black beans or refried beans
  • Fresh salad with tomatoes and avocado
  • Tortilla chips with salsa or guacamole
  • Corn on the cob or elote (Mexican street corn)

Mix and match, or keep it simple – either way, you can’t go wrong.

Frequently Asked Questions

Can I use corn tortillas instead of flour?

Of course! If you prefer a gluten-free option, corn tortillas work well. Just warm them first to prevent cracking.

Can I make this dish vegetarian?

Absolutely! Swap the chicken for roasted veggies or black beans, and you’ll still have a creamy, cheesy delight.

How spicy is this recipe?

This dish is mild, making it family-friendly. Want more heat? Add extra chili powder or use a spicy enchilada sauce.

What’s the best way to shred chicken?

Two forks do the job, but my quick tip: use a stand mixer! It shreds warm chicken in seconds.

Try This Cream Cheese Chicken Enchiladas Recipe Tonight!

Ready to shake up your dinner routine? These easy Cream Cheese Chicken Enchiladas are the answer. With simple ingredients, easy prep, and comforting flavors, they’ll quickly earn a spot in your family’s favorites.

Leave a comment below if you try them and share your favorite enchilada twists! What other family-friendly dinners would you like to see next?

If you love easy chicken recipes, don’t forget to check out my Slow Cooker Chicken Tacos or One Pan Chicken and Rice for more crowd-pleasing ideas!

```

Monday, April 28, 2025

How to Make the Best Oreo Stuffed Chocolate Chip Cookies


Ever wondered what happens when you combine two classic treats—the iconic Oreo and gooey chocolate chip cookies? Let me tell you: pure magic! In today’s post, I’ll Walk you through how to make the best Oreo stuffed chocolate chip cookies right at home. These cookies are huge, soft, and loaded with chocolate in every bite. Plus, they have a hidden Oreo surprise at the center! Whether you’re new to baking or a seasoned pro, this recipe is a game changer.

Why You'll Love These Cookies

If you’ve never tried Oreo stuffed chocolate chip cookies before, you’re in for a real treat. Picture this: a soft, chewy cookie with crispy edges, bursting with melty chocolate, and right at the heart, a whole Oreo cookie. It’s like eating two desserts at once!

  • Fun for all ages: Kids love the surprise inside but trust me—adults go crazy for them too.
  • No fancy skills required: You don’t need to be an expert baker to make these.
  • Perfect for parties: These jumbo cookies are great for birthdays, bake sales, or just a cozy weekend treat at home.

Honestly, whenever I make these cookies, they disappear within minutes. I even caught my neighbor sneaking a few to “take home for her kids”—but I know the truth! 

What You’ll Need


This recipe is pretty straightforward. Most of the ingredients are things you probably already have in your kitchen. Here's what you'll need to make Oreo stuffed chocolate chip cookies:

  • All-purpose flour
  • Baking soda
  • Salt
  • Unsalted butter (softened)
  • Brown sugar (for that chewy texture)
  • Granulated sugar
  • Eggs
  • Vanilla extract
  • Semi-sweet chocolate chips
  • Oreo cookies (regular or double stuff—it’s up to you!)

If you want to switch things up, try using mint Oreos or peanut butter chips instead of standard ones. Baking is all about making things your own!


Step-by-Step: How to Make Oreo Stuffed Chocolate Chip Cookies

Let’s break it down so you know what to expect.

1. Mix Your Dry Ingredients

Start by combining flour, baking soda, and salt in a bowl. Whisk them together, just like you’re mixing up fairy dust. This step makes sure your cookies bake evenly.

2. Cream the Butter and Sugars

Grab a large mixing bowl and use a hand mixer or stand mixer to blend the softened butter, brown sugar, and granulated sugar until it looks fluffy and light. This part is essential for that melt-in-your-mouth texture!

3. Add Eggs and Vanilla

Add your eggs one at a time, mixing after each addition. Finally, splash in some vanilla extract. Can you smell that heavenly aroma already?

4. Combine Wet and Dry Mixtures

Gradually add your dry ingredients to the wet ingredients, mixing just until combined. Don’t overmix—otherwise, your cookies might turn out tough instead of tender.

5. Fold in the Chocolate Chips

Toss in those chocolate chips and use a spatula to fold them through the dough. This is where the magic happens!

6. Shape and Stuff

This is the fun part. Scoop out a generous ball of dough (about two tablespoons), flatten it in your hand, and place an Oreo in the center. Cover the Oreo with another scoop of dough and gently seal the edges. The cookie should look like a little doughy dome—almost like a delicious UFO.

To help you along, here are a few tips:

  • Don’t be afraid to use your hands—it gets a bit messy, but that’s part of the fun.
  • You might want to chill the dough for 20-30 minutes to make handling easier, especially on warm days.

7. Bake!

Arrange the stuffed cookies on a parchment-lined baking sheet, making sure to space them out. They spread as they bake, so give them some room!

Bake in a preheated oven (usually 350°F/175°C) for about 13-15 minutes. The cookies should be golden brown at the edges but still soft in the middle. Don't worry if they look a little underdone—they’ll firm up as they cool.

8. Cool and Enjoy

Let the cookies cool on the pan for 5 minutes, then transfer to a wire rack. Try waiting until they’re completely cool…but if you sneak one while it’s still warm and gooey, I won’t judge!

Tips for the Best Oreo Stuffed Cookies

  • Don’t overbake. Slightly underbaking keeps them soft and chewy with a gooey center.
  • Experiment with mix-ins. White chocolate chips or toffee bits take these cookies to new heights.
  • Freezer-friendly. You can freeze the dough balls with Oreos inside, then bake directly from the freezer (just add a minute or two to baking time).

I once made a double batch for a family picnic. The cookies were gone before dinner was even served! If you bring these to any event, be prepared—everyone will want the recipe.


FAQs

Can I use different types of Oreos?
Absolutely! Try Golden, Mint, or even seasonal flavors for a fun twist.

Do I need to chill the dough?
Chilling helps keep the cookies thick and prevents spreading. If you’re short on time, pop the dough in the fridge for at least 20 minutes.

How long do Oreo stuffed cookies last?
Stored in an airtight container, these cookies stay fresh for up to five days. But honestly, they’ll be gone long before that!

Get Creative!

Baking is all about experimentation. If you want to go wild, try dipping the cooled cookies in melted chocolate or rolling them in sprinkles. There’s no limit to how creative you can get with Oreo stuffed chocolate chip cookies.

Final Thoughts

Making Oreo stuffed chocolate chip cookies is an experience everyone should try at least once. They bring a delightful surprise and are sure to make any day better. Plus, isn’t it fun to see the look on someone’s face when they bite into a cookie and discover an Oreo inside?

If you try this recipe, let me know how it goes! Do you have any favorite twists on this classic? Share your ideas in the comments—I’d love to see what you come up with.

Happy baking! Don’t forget to pour yourself a big glass of milk—you’re going to need it for these delicious cookies.

```

Saturday, April 26, 2025

Easy Cream Cheese and Pepper Jelly Appetizer Recipe Guide

A table full of ingredients to prepare an Easy Cream Cheese and Pepper Jelly Appetizer Recipe Guide


Are you searching for a quick and impressive dish to bring to your next party? Or maybe you just want a delicious snack to enjoy at home? 

Well then let me introduce you to the easiest cream cheese and pepper jelly appetizer—a classic combo that never fails to please a crowd. This creamy, sweet, and spicy spread is ready in minutes, requires barely any effort, and always disappears fast. 

Let’s dive into everything you need to know about making this crowd-pleasing cream cheese and pepper jelly appetizer. I’ll share tips, serving ideas, and even a personal take on why this retro snack deserves a spot on your table.
   

Why You’ll Love This Cream Cheese and Pepper Jelly Appetizer


A table with cream cheese and fruit for Cream Cheese and Pepper Jelly Appetizer


If you're like me, you know the magic of simple appetizers at family gatherings or last-minute get-togethers. There’s just something about this dish that works every time. Here’s why:
  • Ultra-easy: You only need two main ingredients and five minutes—no cooking required!
  • Crowd-favorite: The rich cream cheese and sweet-spicy jelly are a perfect match for crackers. Everyone loves it, from kids to adults.
  • Versatile: Dress it up for holidays or keep it casual for weeknight snacking.
  • Budget-friendly: No fancy specialty ingredients needed.
What more could you ask for?
   

What Is Pepper Jelly?

If you haven’t tried pepper jelly before, it’s about time! Think of fruity jelly but with a kick of spice from hot peppers. 

Pepper jelly can be red or green, mild or slightly spicy, depending on the peppers used. Picture this: the smooth, cool taste of cream cheese paired with the sweet heat of pepper jelly, served with crisp crackers. 

Each bite is a delightful mix of creamy, spicy, and sweet flavors. Trust me, there’s a reason this appetizer has stood the test of time!
   

Ingredients You’ll Need

You really can’t get much simpler than this. To make this cream cheese and pepper jelly appetizer, gather:
  • 1 block of cream cheese: Regular or reduced fat both work well.
  • Pepper jelly: Available in most grocery stores, usually near the jams and jellies. Choose your favorite flavor!
  • Assorted crackers: The perfect vessels for scooping up this tasty treat.
That’s it! Of course, you can get creative with garnishes if you like—maybe a sprinkle of chives for color or a handful of toasted pecans for crunch.
   

How to Make Cream Cheese and Pepper Jelly Appetizer


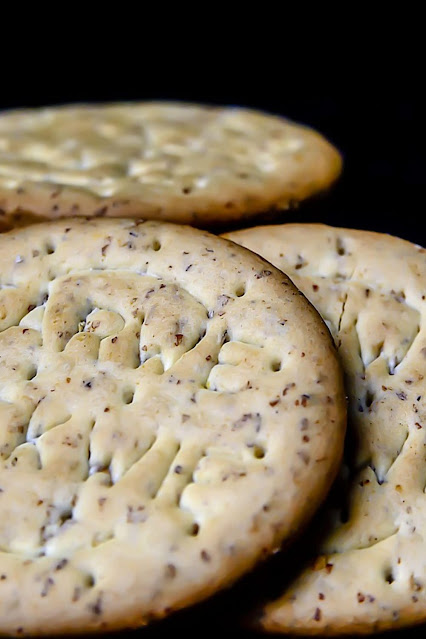
Wheat Crackers to show How to Make Cream Cheese and Pepper Jelly Appetizer


This is the kind of recipe you’ll turn to again and again because it’s practically foolproof. Here’s how to whip it up:
  1. Unwrap your cream cheese and place it on a serving platter. I like to use a small rectangle plate or a shallow bowl—anything that makes scooping easy.
  2. Spoon the pepper jelly over the top of the cream cheese. How much jelly you use is up to you. I usually go for a generous layer, letting it drip down the sides.
  3. Add optional toppings. Sprinkle on chives, chopped nuts, or even a little citrus zest for a bright touch.
  4. Serve with crackers. Place your favorite crackers or pretzel crisps around the platter. That’s it!
No oven, no fancy gadgets, no stress.

Serving Suggestions

Want to elevate this starter? I’ve got a few ideas to boost your appetizer table:
  • Individual servings: If you’re hosting a larger crowd, try spreading cream cheese and pepper jelly onto crostini for instant finger food.
  • Mix and match: Add other dips and spreads on your board, like hummus or olive tapenade, for variety.
  • Make it a sandwich: Yes, leftover cream cheese and pepper jelly make an amazing sandwich spread with turkey or ham!
Substitution and Customization Ideas


Substitution and Customization Ideas for Making Cream Cheese and Pepper Jelly Appetizer


One of the best things about this appetizer is that you can adapt it to suit your taste or dietary needs. Here are some suggestions:
  • Need it dairy-free? Use a plant-based cream cheese alternative.
  • Want less spice? Go for a milder pepper jelly or mix in a bit of regular fruit jam.
  • Going gluten-free? Serve with gluten-free crackers or fresh veggies.
  • Like it extra spicy? Add a pinch of crushed red pepper on top or choose a hotter jelly.
The fun part is making it your own! 

Tips for Success

After making this easy appetizer dozens of times, here are a few things I’ve learned along the way:
  • Let the cream cheese sit at room temperature for a few minutes before serving. It’s easier to spread this way.
  • If you want to get fancy, you can whip the cream cheese for a fluffy texture, but the classic block works just fine.
  • Don’t assemble too far ahead of time; the jelly can start to slip off the cheese after a while.
  • Offer a spreading knife or two so people can serve themselves easily.
Did I mention this is also a great conversation starter? Guests always ask about the pepper jelly and where to find it.   

Frequently Asked Questions

Can I use homemade pepper jelly? Absolutely! If you have a favorite family recipe, this is a perfect way to showcase it. 

How long does it last? If you have leftovers (rare, in my house!), just cover and refrigerate. It’s best eaten fresh but can last a day or two. 

What if I can’t find pepper jelly? Try using sweet chili sauce or a spicy fruit preserve for a similar flavor.


Final Thoughts: The Perfect Party Appetizer

Why do I come back to this cream cheese and pepper jelly appetizer time after time? It’s simple: it’s delicious, effortless, and never fails. Whether you’re new to hosting or a seasoned entertainer, this recipe is a must-add to your collection. 

So next time you need a last-minute party snack, give this nostalgic favorite a try. Your friends and family will love you for it! Have you tried this appetizer before? Do you have any creative variations to suggest? 

Let me know in the comments below! And don’t forget to save this recipe for your next get-together. Happy snacking!

Thursday, April 24, 2025

Easy Garlic Turmeric Rice Recipe for Flavorful Weeknight Dinners

Are you searching for a quick and delicious side dish that can jazz up your weeknight dinners? Look no further! Garlic turmeric rice is a simple, aromatic recipe that brings both color and flavor to your table. 

Whether you’re a busy parent, a college student, or just someone craving something tasty and different, this dish is a game changer. 

Let’s explore how to make this vibrant rice, why you’ll love it, and a few tips to make it your new go-to.

A picture of Easy Garlic Turmeric Rice Recipe for Flavorful Weeknight Dinners


Why Garlic Turmeric Rice Is The Perfect Side Dish

If you’re tired of plain steamed rice, you’re not alone. We all love something that’s easy, but wouldn’t it be great if it also packed a punch of flavor? That’s exactly where garlic turmeric rice shines!

  • It’s quick and easy – just a handful of ingredients and minimal prep time.
  • It’s nutritious – turmeric is known for its anti-inflammatory properties, and garlic offers a host of health benefits, too.
  • It’s versatile – this rice pairs perfectly with so many dishes, from grilled chicken to curries, or even on its own.
  • It’s stunning – that golden-yellow color looks beautiful on any dinner spread.

Rice doesn’t have to be boring. With the simple addition of a few spices, you can make something truly memorable.

What You’ll Need: Ingredients For Garlic Turmeric Rice

The beauty of this recipe is how basic the ingredient list is. You probably already have most of these on hand. Here’s what you’ll need:

  • White jasmine rice (or any long-grain rice)
  • Fresh garlic
  • Turmeric powder
  • Chicken or vegetable broth
  • Butter or oil
  • Salt and pepper
  • Fresh cilantro or parsley for garnish (optional, but it adds freshness!)

See? Nothing fancy! Each ingredient plays a key role in creating the bold flavors of this dish. The turmeric gives a warm, earthy note, while the garlic adds that irresistible aroma and taste. The broth makes the rice super fluffy and adds subtle richness.

Easy Garlic Turmeric Rice Recipe for Flavorful Weeknight Dinners


How To Make Garlic Turmeric Rice (Step-By-Step)

1. Rinse Your Rice

This might sound like a small detail, but rinsing your rice in cold water removes excess starch and helps prevent stickiness. I usually swirl it around in a bowl, drain, and repeat 2–3 times until the water runs mostly clear.

2. Sauté The Garlic and Spices

In a medium saucepan over medium heat, add your butter or oil. Once hot, toss in the minced garlic and sauté until fragrant—about 30 seconds. Be careful not to let it burn.

Next, add your turmeric powder. Stir it around with the garlic, letting the spices bloom. This step unlocks a deeper, richer flavor.

3. Add The Rice

Now add the rinsed rice to the pot, stirring it well to coat each grain in the garlic-and-turmeric-infused oil. This step is a game-changer for both texture and taste.

4. Pour In The Broth

Add your chicken or vegetable broth. This replaces the usual plain water and gives your rice that extra savory finish. Don’t forget to sprinkle in a bit of salt and pepper for seasoning.

5. Simmer And Cook

Bring the whole pot to a gentle boil, then immediately lower the heat to cover and simmer. Let it cook, undisturbed, for about 12–15 minutes (depending on your rice), or until all the liquid is absorbed. Don't peek too often—steam is your friend here!

6. Let It Rest

When the rice is done, turn off the heat and let it sit, covered, for another 5 minutes. This helps everything finish steaming and guarantees that fluffy texture.

7. Fluff And Serve

Use a fork to gently fluff the rice. Toss in some chopped cilantro or parsley if you like a fresh burst of green. Your garlic turmeric rice is now ready to serve!


Easy Garlic Turmeric Rice Recipe for Flavorful Weeknight Dinners

Tips For Perfectly Cooked Garlic Turmeric Rice

  • Use fresh garlic if you can. Pre-minced garlic works in a pinch, but nothing beats the aroma of freshly minced cloves.
  • Don’t skip the rinsing. It really does make for fluffier rice.
  • Watch your turmeric! A little goes a long way. Too much, and the rice may turn bitter or overpowering.
  • Taste and season at the end. Broths can have different sodium levels, so adjust the salt and pepper to your preference.
  • Add-ins are welcome! Stir in frozen peas, chopped carrots, or corn for more color and nutrition.

Make It Your Own: Variations And Serving Suggestions

Garlic turmeric rice is the type of recipe that plays well with almost anything. Here are a few ideas to inspire you:

  • Add protein: Top your rice with grilled chicken, tofu, or shrimp for a complete meal.
  • Pair with curries: The mild, aromatic flavor complements spicy curries or stir-fries.
  • Make it vegetarian: Use vegetable broth and load with your favorite veggies.
  • Go Mediterranean: Add a sprinkle of feta, olives, and cherry tomatoes for a fusion twist.
Easy Garlic Turmeric Rice Recipe for Flavorful Weeknight Dinners

Growing up, my family always gravitated toward recipes that were both quick and packed with flavor. This rice brings back memories of comforting dinners after hectic days—a reliable recipe, yet exciting enough that I was always happy to see it on the table.

Why Turmeric? A Simple Superfood

What’s the big deal about turmeric, anyway? Besides bringing that lovely golden color, turmeric is often praised as a superfood. It contains curcumin, a powerful antioxidant thought to have anti-inflammatory benefits. That means your rice isn’t just tasty—it’s also doing your body a favor. Always nice when something so delicious is also good for you, right?

Frequently Asked Questions

Can I use brown rice?

Absolutely! Brown rice just needs a longer cooking time and a bit more liquid, but the result is slightly nuttier and just as delicious.

What can I do if I don’t have turmeric?

While turmeric is the star here, a little curry powder or smoked paprika can make a nice substitute for a different twist.

Can I freeze garlic turmeric rice?

Yes! Let it cool completely, pack in freezer-safe bags, and store for up to 3 months. Reheat in the microwave or on the stove with a splash of water.

Final Thoughts: The Magic Of Garlic Turmeric Rice

If you’re looking to add something new to your dinner rotation, garlic turmeric rice is a simple yet standout choice. It’s easy, healthy, and bursting with flavor. Plus, the scent of garlic and spices filling your kitchen is enough to bring everyone to the table.

Will you give this recipe a try tonight? Let me know how it turns out, and don’t be afraid to add your own twist. After all, the best recipes are the ones that fit your life (and your cravings) perfectly.

Looking for more easy rice recipes or weeknight dinner ideas? Stay tuned for more simple and tasty meals your whole family will love!


How to Make Authentic Black Forest Cake at Home

How to Make Authentic Black Forest Cake at Home

Ever tasted a dessert so rich and delightful that you can’t help but crave another slice? That’s exactly how I felt the first time I tried a real Black Forest Cake

If you’re a chocolate lover or just after a show-stopping dessert for your next celebration, you’re in for a treat! Today, let’s explore how you can make an authentic Black Forest Cake right in your own kitchen. 

It’s easier than you think, and you don’t need to be a pastry chef to pull it off.

What is a Black Forest Cake?

A picture of How to Make Authentic Black Forest Cake at Home

The Black Forest Cake, also known as “Schwarzwälder Kirschtorte” in Germany, is a classic cake made with layers of moist chocolate sponge, sweet-tart cherries, and fluffy whipped cream. The whole masterpiece gets drenched in a cherry liqueur called Kirsch (sometimes swapped for cherry syrup for a kid-friendly version). Finally, it’s garnished with chocolate shavings and extra cherries—pure bliss in every bite!

Why is this cake so popular?

This cake’s magic comes from its perfect blend of flavors and textures. The deep chocolate pairs with juicy cherries, while the whipped cream adds a light, airy touch. It’s not too sweet, but always indulgent. Whether you’ve got memories of sharing this cake with family or you’ve only admired its beauty in bakery windows, you’ll love making it at home.

Ingredients You’ll Need

Cool Whip and cherries for Ingredients you'll need to make Black Forest Cake Recipe

Before diving into the steps, gather these ingredients to get authentic Black Forest flavor:

  • Chocolate cake: Use a rich, moist chocolate sponge. If you’re feeling adventurous, make your own from scratch.
  • Cherries: Sour cherries are traditional, but fresh or canned work. Reserve some for decorating.
  • Kirsch (cherry liqueur): This soaks the cake for extra flavor. For a non-alcoholic twist, swap it with cherry juice or syrup.
  • Whipped cream: Freshly whipped is always best. Avoid pre-made toppings for the authentic experience.
  • Chocolate shavings: Use a vegetable peeler to create elegant curls from a chocolate bar.
  • Sugar: Adds sweetness to the cake and the cream.
  • Cornstarch: For thickening the cherry filling.
  • Eggs, butter, flour, cocoa powder, baking powder, salt: The basics for a tender chocolate cake.

Once you have everything, it’s time to get baking. Trust me, the homemade taste is worth every bit of effort!

Step-by-Step: How to Make Black Forest Cake

1. Bake the Chocolate Cake Layers

First things first, you want soft, fluffy cake layers. This forms the backbone of your Black Forest Cake. Here’s what to do:

  • Preheat your oven and line your cake pans. This stops your cake from sticking later.
  • Cream together sugar and butter until light and fluffy.
  • Beat in your eggs, one at a time. This keeps the batter smooth.
  • Sift together flour, cocoa powder, baking powder, and salt. Add these to your wet ingredients, alternating with milk.
  • Divide the batter between your pans and bake until a toothpick comes out clean.

If you’re short on time, don’t stress! Store-bought chocolate sponge cakes work too, but homemade really lifts this dessert to new heights.

2. Make the Cherry Filling

A bowl of fresh cherries for Ingridents you'll need to make for Black Forest Cake Recipe

While your cakes are cooling, let’s create that signature cherry layer:

  • Drain your cherries, reserving the juice. In a pan, combine cherries, sugar, and a bit of cornstarch.
  • Heat the mixture until it thickens into a glossy cherry sauce.
  • Stir in a splash of Kirsch (or cherry juice) for extra flavor.

This filling brings tartness and color to the cake—and it smells amazing as it cooks!

3. Whip the Cream

There’s really nothing better than fresh whipped cream:

  • In a cold bowl, pour in your heavy cream.
  • Add a little sugar and beat until you see stiff peaks.

Pro tip: For best results, chill your mixing bowl and beaters first. It only takes a few minutes but makes a world of difference.

4. Assemble the Cake

Now’s the fun part—layering all those delicious elements! If you’ve ever played with building blocks as a kid, this will be a breeze.

  1. Slice your cooled cake into even layers—usually two or three.
  2. Brush each layer with cherry liqueur or syrup. This makes them moist and flavorful.
  3. Spread cherry filling over the first cake layer, then top with whipped cream.
  4. Repeat with the remaining layers.
  5. Once stacked, cover the outside and top with more whipped cream.
  6. Decorate with chocolate shavings and extra cherries. Don’t worry about perfection—homemade cakes have character!

The end result? A dreamy cake that’s just as beautiful as it is delicious.

Tips for the Best Black Forest Cake

Want your homemade Black Forest Cake to taste like something from a bakery? Follow these quick tips:

  • Use quality cocoa powder and chocolate: The richer the chocolate, the more decadent your cake.
  • Don’t skip the soaking: The cake should be moist but not soggy.
  • Chill the cake before serving: This helps the flavors meld and makes slicing easier.
  • Fresh whipped cream always wins: Avoid canned or frozen whipped toppings.
  • Decorate with love: Extra cherries and chocolate shavings make the cake irresistible!
A half of Black Forest Cake eaten to Bring a Taste of Germany Home

Common Questions About Black Forest Cake

Can I make this cake ahead of time?
Absolutely! In fact, letting the cake rest in the fridge for a few hours—or even overnight—makes it even better. Just keep it covered so it doesn’t dry out.

What if I can’t find Kirsch?
No worries. Use cherry juice or the syrup from canned cherries. You’ll still get plenty of cherry flavor without the alcohol.

Is it okay to use frozen or canned cherries?
Definitely. While fresh cherries add a special touch, frozen or canned cherries save time, and still taste delicious.

Final Thoughts: Bring a Taste of Germany Home

There’s just something special about baking a classic cake from scratch—especially one as beloved as Black Forest Cake. You don’t need fancy equipment or years of baking experience. Just gather your ingredients, follow the steps, and pour in a little love.

Why not surprise your family or friends with this beautiful dessert? Or maybe you want to enjoy a slice with coffee on a Sunday afternoon. However, you serve it, making Black Forest Cake is a small act of joy—and your kitchen will smell amazing.

If you give this recipe a try, let me know how it goes! Have you tried making Black Forest Cake before, or do you have any tips to share? Drop a comment below—I’d love to hear your baking adventures.

```

Easy Sheet Pan Salmon Recipe for Healthy Weeknight Dinners

Are you looking for a quick, healthy dinner that your whole family will love? Look no further! This easy sheet pan salmon recipe checks every box. 

Not only is it packed with flavor, but it's also super simple to prepare – just toss everything onto one pan, bake, and dinner’s ready.

If you’ve ever found yourself staring into your refrigerator wondering, “What should I cook tonight?” you’re not alone. Between work, school, and everything else on our plates, making a nutritious meal during a busy weeknight can feel like an impossible task. 

But don’t worry – sheet pan dinners are here to save the day.

Salmon on a sheet pan with brocolli and lemon wedges to showcase asy Sheet Pan Salmon Recipe for Healthy Weeknight Dinners

Why You’ll Love Sheet Pan Salmon

Let’s face it. Cleaning up after dinner can sometimes be the hardest part of cooking. But with this sheet pan salmon recipe, you only have one pan to wash. Isn’t that music to your ears? And the best part: the whole meal comes together in under 30 minutes.

  • Healthy and Nutritious: Loaded with omega-3-rich salmon and colorful veggies.
  • Timesaving: Prep and cleanup are a breeze.
  • Family-friendly: Even picky eaters will find something to love.
  • Customizable: Easily swap out veggies or seasonings based on what you have on hand.

The Magic of Sheet Pan Dinners

Think about sheet pan meals as your kitchen’s shortcut to flavor and convenience. Instead of juggling multiple pots on the stove, everything cooks together in the oven. The salmon comes out juicy and flaky, while the veggies are perfectly roasted and seasoned. It’s like hitting the “easy button” for dinner!

Does Salmon Really Taste Good Cooked This Way?

Absolutely! Roasting salmon on a sheet pan keeps it moist and tender. The natural juices from the fish blend with whatever veggies you use, creating an irresistible flavor. My family couldn’t believe how tasty roasted salmon can be the first time I tried this method. If you think fish is bland or tricky to cook, you’re in for a pleasant surprise.

Key Ingredients for Sheet Pan Salmon

You only need a few simple ingredients for this healthy weeknight dinner:

  • Fresh Salmon Fillets: Choose skin-on or skinless, and look for vibrant, pink flesh.
  • Seasonal Vegetables: Bell peppers, red onion, cherry tomatoes, zucchini, or asparagus all work well.
  • Lemon Slices: For a burst of freshness.
  • Olive Oil & Simple Spices: Garlic, salt, pepper, paprika, and a little dried herb like oregano or thyme.

Don’t have all these on hand? No worries! Feel free to use whatever veggies or spices you love. The recipe is incredibly flexible – just like your favorite pair of jeans.

How to Make Easy Sheet Pan Salmon

Woman in kitchen preparing How to Make Easy Sheet Pan Salmon

This recipe is as straightforward as it gets. Even if you’re new to cooking, you can nail it on the first try. Let’s break it down step-by-step:

  1. Prep Your Veggies
    Chop your vegetables into even-sized pieces. This helps everything cook at the same rate. Spread them out on a large sheet pan in a single layer.
  2. Season Everything
    Drizzle olive oil over the veggies and sprinkle with salt, pepper, and your favorite seasonings. Mix to coat.
  3. Add the Salmon
    Place the salmon fillets on top of the vegetables. If you’re a fan of crispy salmon skin, put it skin side down. Add a light drizzle of olive oil and another sprinkle of seasoning. Top each fillet with a lemon slice.
  4. Bake to Perfection
    Pop the sheet pans into a preheated oven at 400°F (200°C). Bake for 12-15 minutes or until the salmon is just opaque and flakes easily with a fork. That’s it!

One of my kids likes salmon best with a little bit of honey drizzled on top – so don’t be afraid to experiment! That’s the beauty of home cooking.

Easy Sheet Pan Salmon Tips & Variations

  • Use What You Have: Swap in broccoli, carrots, or green beans if you don’t have the veggies listed above.
  • Make It Spicy: Add a pinch of chili flakes or a squeeze of sriracha for a kick.
  • Mix Up Your Herbs: Dill, parsley, or basil are all delicious options for salmon.
  • Try Different Citrus: Limes or oranges bring their own unique twist.
  • Add Starch: Toss small potatoes or sweet potato chunks on the pan for a more filling meal.

Don’t be afraid to play chef. Sheet pan recipes are very forgiving, so feel free to get creative!

Serving Suggestions


A plate with Salmon, brocolli and rice in kitchen counter for Serving Suggestions


Wondering what to serve with your sheet pan salmon? Here are a few ideas:

  • Steamed Rice: A classic side that soaks up all the tasty juices.
  • Crusty Bread: Perfect for sopping up the lemony olive oil left on the pan.
  • Simple Green Salad: For extra crunch and freshness.

If you’re feeding a crowd, just add more salmon and veggies – no need for extra pans. This meal scales up beautifully.

Why Sheet Pan Salmon is the Healthy Choice

Salmon isn’t just delicious; it’s also one of the healthiest protein options out there. It’s packed with omega-3 fatty acids, which are good for your heart and brain. Plus, roasted vegetables are full of fiber, vitamins, and minerals. It’s a meal that makes you feel as good as it tastes.

And the best part? Kids love it!

One night, my picky eater declared that salmon was “just like chicken but better.” Who knew? Sometimes the simplest meals are the biggest hits.

Frequently Asked Questions

How do you know when salmon is done?

Salmon is ready when it’s opaque and flakes easily with a fork. If you have a food thermometer, look for an internal temperature of 145°F (63°C).

Can I use frozen salmon?

Yes, but let it thaw first and pat dry before baking. This helps it cook evenly and prevents excess moisture on your pan.

What if my veggies aren’t cooked by the time the salmon is done?

Cut your veggies into smaller pieces or give them a head start in the oven for 10 minutes before adding the salmon.

Final Thoughts – Give Sheet Pan Salmon a Try!


Vegetables on the table to use for Easy Stheet Pan Salmon Recipe

Easy, healthy, and full of flavor – this sheet pan salmon recipe is a total weeknight winner. With only a handful of ingredients and minimal cleanup, you’ll have more time to relax after dinner. Next time you’re stuck in a dinner rut, remember all you need is one pan and a little imagination.

Ready to make your weeknights easier and tastier? Grab some fresh salmon, your favorite veggies, and try this sheet pan salmon recipe.

 Let me know what creative combos you come up with – dinner inspiration is always welcome!

```

Easy Air Fryer Garlic Bread Recipe Ready in Minutes

Easy Air Fryer Garlic Bread Recipe Ready in Minutes

Have you ever craved golden, buttery garlic bread but didn’t want to turn on the oven or wait ages for it to toast? 

What if I told you that you could whip up irresistible, crispy garlic bread in under 10 minutes—no oven required? Yes, it’s true! 

Thanks to the air fryer, this classic side dish is easier and quicker than ever. Today, I’m sharing my favorite easy air fryer garlic bread recipe that will have your kitchen smelling amazing and your taste buds oh-so-happy.

An air fryer full of Garlic Bread for Easy Air Fryer Garlic Bread Recipe Ready in Minutes

Why Make Garlic Bread in the Air Fryer?

Let’s face it: Traditional garlic bread can take a while to prepare. You might preheat the oven, arrange the bread, and then wait another 10-15 minutes for it to crisp up. Meanwhile, you’re left wishing you could just dig in. 

That’s where the air fryer comes in! Here are a few reasons why you should make garlic bread in your air fryer:

  • Speed: Cooks in just 4-5 minutes, perfect for busy nights!
  • Even crispiness: The hot circulating air ensures every piece is perfectly browned.
  • No need to heat the oven: Especially great when you don’t want to warm up your whole kitchen.
  • Simple cleanup: Less mess, fewer dishes, more time to relax.

I remember the first time I tried making garlic bread in my air fryer. Honestly, I was skeptical. Could it really be that good? One bite was all it took—I was hooked! The edges were crunchy, the inside soft, and the flavor out of this world. Now, it’s my go-to method every time.

The Secret to Perfect Air Fryer Garlic Bread

Garlic in air fryer sitting on the cutting board to showcase The Secret to Perfect Air Fryer Garlic Bread

What makes this garlic bread so special? It all starts with a good foundation and a few simple ingredients. Here’s what you’ll need:

  • Bread: French baguette or Italian loaf gives the best results. Try sourdough for extra tang!
  • Butter: Real, unsalted butter for that rich, creamy flavor.
  • Garlic: Fresh garlic packs the most punch.
  • Parsley: Fresh or dried—this adds a lovely color and a hint of herbiness.
  • Salt: A touch brings all the flavors together.
  • Grated parmesan (optional): Cheese lovers, this step’s for you!

It’s amazing—such simple staples, yet together they create something truly unforgettable. If you want to keep it vegan, just opt for dairy-free butter and skip the cheese.

Making the Garlic Butter Spread


This is where the magic happens. Melt your butter, then stir in minced garlic, parsley, and salt. If you’re a cheese fan, add a sprinkle of parmesan. I always say, “Don’t hold back on the garlic!” The more, the merrier. If you like things zesty, a pinch of your favorite Italian herbs works great too.

How to Make Garlic Bread in the Air Fryer – Step by Step

Ready to get started? Here’s how to make this easy air fryer garlic bread from scratch:

  • 1. Prepare your bread: Slice your baguette or loaf into ½-inch thick pieces. Not too thick, not too thin—just right to hold your buttery spread without getting soggy.
  • 2. Mix the garlic butter: In a bowl, combine the softened butter, garlic, parsley, and salt. Mix until it’s nice and even.
  • 3. Spread it on: Generously slather the butter mixture onto each bread slice. Trust me, the more you use, the better!
  • 4. Cook in the air fryer: Arrange the slices in a single layer in your air fryer basket. Don’t overcrowd—if needed, work in batches.
  • 5. Air fry at 350°F (175°C): Let them cook for 4-5 minutes or until golden and crispy. Keep a close eye, as every air fryer is a bit different.
  • 6. Serve hot: Enjoy your garlic bread straight from the basket, warm and toasty!

Want it extra crispy? Add 1-2 more minutes—but don’t step away, or they might toast up faster than you expect!

Tips and Tricks for Air Fryer Garlic Bread Success

Making garlic bread is simple, but a few tricks can take your game to the next level:

  • Use day-old bread: Slightly stale bread holds up better and gets extra crunchy.
  • Soften (not melt) butter: Room temperature butter blends easier with garlic and spreads more evenly.
  • Don’t overcrowd: Proper air circulation is key for crispiness.
  • Customize: Add chili flakes for heat or swap parsley for basil if you’re in the mood.

I love experimenting with extra toppings. Some days, I’ll toss on a bit of mozzarella before air frying for cheesy garlic bread. Have picky eaters at home? Let them choose and add their favorite herbs. Cooking should always be fun!

What to Serve with Air Fryer Garlic Bread


Garlic bread is so versatile. It goes beyond just spaghetti! Here are some ideas to round out your meal:

  • With Pasta: Classic choice—think fettuccine alfredo, spaghetti bolognese, or creamy penne.
  • With Soup: Dunk it in tomato soup, minestrone, or chicken noodle for cozy comfort.
  • Alongside Salad: Pair with Caesar, caprese, or a simple green salad for a lighter meal.
  • As a Snack: Honestly, sometimes I make garlic bread just for a mid-afternoon treat!

Leftovers? Pop them back in the air fryer for one minute to re-crisp—they’ll taste freshly made every time.

Frequently Asked Questions

Can I use store-bought garlic bread in the air fryer?

Absolutely! Store-bought frozen garlic bread cooks up beautifully in the air fryer. Just follow the same temperature and check at the 4-5 minute mark. It’s a fantastic time-saver!

How should I store leftover garlic bread?

Wrap your leftover garlic bread in foil or an airtight container and refrigerate for up to 2 days. To reheat, pop it back in the air fryer for 1-2 minutes. Good as new!

What kind of butter works best?

Unsalted butter lets you control the salt level, but salted works if that’s all you have. For a lighter option, try a blend of butter and olive oil.

Final Thoughts—Why You’ll Love Air Fryer Garlic Bread

If you’ve ever wanted fresh, crispy garlic bread in a flash, the air fryer is your new best friend. It’s fast, it’s simple, and the taste is out of this world. Whether you’re making dinner for the family or just want a quick snack, this recipe is sure to please. I promise, after you try air fryer garlic bread, you’ll wonder how you ever lived without it.

So, what are you waiting for? Grab your ingredients, preheat that air fryer, and let’s turn an ordinary loaf of bread into an extraordinary treat. Your next meal is about to be so much tastier!

Have you tried air fryer garlic bread? Share your favorite variations or tell us how it turned out in the comments below!

```

Tuesday, April 22, 2025

Ultimate Guide to Baking Moist and Rich German Chocolate Cake

Ready to make a showstopping dessert that’s both decadent and bursting with flavor? Look no further than a moist and rich German Chocolate Cake. Whether you’re baking for a special occasion or simply want to satisfy that chocolate craving, this delicious layer cake hits all the right notes—chocolate, coconut, and pecan perfection!

A chocolate cake sitting on the counter to show the Ultimate Guide to Baking Moist and Rich German Chocolate Cake


What Makes German Chocolate Cake So Special?

Ever wondered why German Chocolate Cake is so beloved? It’s not just a regular chocolate cake. The magic is in the layers—a soft, tender chocolate cake paired with a gooey, caramel-like coconut pecan frosting.

 Unlike other cakes, the frosting nestles right between the layers instead of covering the whole exterior. It’s a treat that feels both nostalgic and totally irresistible.

And fun fact—its name doesn’t come from Germany. It’s actually named after Samuel German, the chocolatier! He developed a special sweet baking chocolate for the recipe, so don’t let the name fool you.

Key Ingredients for German Chocolate Cake

A chocolate cake probed to show the Key Ingredients for German Chocolate Cake


Before you tie on an apron, let’s talk ingredients. To get that signature taste and texture, you’ll need:
  • Quality Cocoa Powder: Use Dutch-processed cocoa for a richer flavor and darker color.
  • Buttermilk: This makes your cake extra moist and tender.
  • Eggs: Essential for structure and richness.
  • Coconut and Pecans: The stars of the famous frosting!
  • Evaporated Milk: Gives the frosting its creamy, dreamy texture.
  • Granulated and Brown Sugar: Adds moisture and depth.

Step-by-Step: How to Bake the Perfect German Chocolate Cake

1. Prepare Your Pans and Preheat the Oven

Always start by preheating your oven to 350°F (175°C). Grease and line three 8-inch cake pans with parchment paper. This step guarantees your layers come out easily and look picture-perfect!

2. Mix the Dry Ingredients

Mix together flour, cocoa powder, baking powder, baking soda, and salt. This makes sure your leavening agents are evenly distributed, so your cake rises beautifully.

3. Cream Butter and Sugars

Beat softened butter with sugar until light and fluffy. This step isn’t just for looks—it traps air, which helps create that tender, moist crumb we all love.

4. Add Eggs, One At A Time

Add the eggs in slowly, mixing well after each one. Think of eggs as the glue that holds your cake together.

5. Combine Wet and Dry Ingredients

Now comes the fun part! Alternate adding your dry ingredients and buttermilk to the butter mixture. Doing it in batches keeps your batter smooth and lump-free.

6. Bake!

Divide the batter evenly among the pans. Bake for about 30-35 minutes. To check if they're done, insert a toothpick—it should come out clean or with a few moist crumbs.

Making the Famous Coconut-Pecan Frosting

A woman with all the ingredients while she's Making the Famous Coconut-Pecan Frosting

This frosting is where German Chocolate Cake really shines. It’s not your average frosting—think creamy, nutty, candy-bar heaven!

  • Butter and Sugar: Melt these in a saucepan until combined.
  • Egg Yolks and Evaporated Milk: Add and stir constantly. It’ll thicken up, kind of like a custard.
  • Coconut and Pecans: Stir in once your mixture thickens. Don’t forget a splash of vanilla for extra flavor.

Let your frosting cool before spreading it on the cake layers. Trust me, it’s worth the wait!

How to Assemble and Decorate Your Cake

A woman in the kitchen as she shows How to Assemble and Decorate Your Cake

  • Level Your Cake Layers: Use a serrated knife if needed to make the tops flat. This makes stacking easier.
  • Add Frosting Between Layers: Generously spread the coconut-pecan frosting between each layer.
  • Top It Off: Pile the last bit of frosting on the very top.

For an extra touch, you can decorate the sides with some chocolate ganache or even chocolate shavings. I like to toast a bit of coconut and toss it on top for crunch and flair!

Helpful Tips for Cake Success

Baking can be a little intimidating, but don’t worry—I’ve got your back! Here are some tips that help me get it right every time:

  • Use Room Temperature Ingredients: This ensures everything blends together smoothly.
  • Don’t Overmix: Too much mixing can make your cake dense. Mix until just combined.
  • Chill Before Slicing: Letting the cake chill helps the frosting set, so you get clean slices.
  • Don’t Rush the Frosting: Stir patiently—if it’s too runny, your layers might slide around.

Frequently Asked Questions

What’s the difference between German Chocolate Cake and regular chocolate cake?

It’s all about the frosting! German Chocolate Cake is known for its coconut-pecan frosting, while other chocolate cakes usually have a classic buttercream or ganache.

Can I use a different pan size?

Absolutely! Just keep in mind that using larger or smaller pans will affect baking time, so keep an eye on those layers as they bake.

How should I store leftover cake?

Cover it well and refrigerate. It’ll stay fresh for about five days—if it even lasts that long! You can also freeze the cake for longer storage.

Pairings and Serving Suggestions

  • Serve with a scoop of vanilla ice cream for dessert heaven.
  • Pair with strong coffee or espresso.
  • Sprinkle extra toasted pecans or coconut on top for an extra-crunchy bite.

Final Thoughts: Time to Bake!

There’s something special about making a classic German Chocolate Cake from scratch. It’s a labor of love, but the end result is totally worth it. If you’ve never tried baking one before, why not give it a go this weekend? 

Gather your ingredients, follow these easy steps, and treat yourself—and your loved ones—to a slice of coconut-pecan bliss.

Have questions or want to share your results? Drop a comment below! 

Happy baking, cake lovers!

```

Creamy Cajun Chicken Pasta Recipe: Quick, Flavorful Dinner Idea

Looking for a delicious weeknight meal that comes together in a flash? Let me introduce you to creamy Cajun chicken pasta—a dish that hits all the right spots. It’s spicy, it’s creamy, it’s packed with flavor, and best of all, it’s easy to make in just 30 minutes. 

Whether you’re cooking for your family or just making dinner for yourself, this recipe promises comfort and excitement in every bite!

A plate with Creamy Cajun Chicken Pasta Recipe:  Quick, Flavorful Dinner Idea


Why You’ll Love This Creamy Cajun Chicken Pasta

If you adore bold flavors with a hint of heat, this pasta is for you. But even if spicy food isn’t your usual go-to, don’t worry—the cream sauce balances the Cajun spice perfectly, so it’s just the right amount of kick. I remember the first time I made this for my family, and everyone went back for seconds. Here’s what makes it so special:

  • Quick and easy: The recipe takes under 30 minutes from start to finish.
  • One-pan wonder: Minimal clean-up means more time to relax after dinner.
  • Restaurant quality: You get all the flavor of takeout without leaving home.
  • Customizable: Adjust the spice level and ingredients to your liking.
  • Family favorite: Kids and adults both love the creamy, savory sauce.

What Is Cajun Chicken Pasta?

An image of a plate showing how to What Is Cajun Chicken Pasta?

Cajun chicken pasta brings together juicy seasoned chicken and tender pasta in a creamy sauce. The magic lies in the Cajun seasoning, which is a robust blend of spices like garlic powder, paprika, cayenne pepper, and oregano. 

Think of it as a flavor-packed hug for your taste buds—spicy yet comforting, with creamy richness to round things out.

What Is Cajun Seasoning?

Cajun seasoning is the soul of this dish. It gives the chicken and sauce their kick and brings all the flavors together. 

If you don’t have store-bought Cajun seasoning, you can quickly make your own by mixing:

  • 1 teaspoon paprika
  • 1/2 teaspoon garlic powder
  • 1/2 teaspoon onion powder
  • 1/2 teaspoon cayenne pepper (adjust to taste)
  • 1/2 teaspoon dried oregano
  • 1/2 teaspoon salt
  • 1/4 teaspoon black pepper

This homemade blend is perfect for adding a burst of flavor to your Cajun chicken pasta or any other dish you want to spice up!

Ingredients You’ll Need

You don’t need any fancy ingredients for this easy dinner idea. Here’s a simple shopping list for your creamy Cajun chicken pasta:

  • Chicken breast: Boneless, skinless works best.
  • Cajun seasoning: Store-bought or homemade.
  • Pasta: Penne, fettuccine, or your favorite shape.
  • Butter and olive oil: For pan-frying and extra richness.
  • Garlic: Freshly minced for that delicious aroma.
  • Bell peppers: Red and green for sweetness and crunch.
  • Heavy cream: This is what makes the sauce so luxuriously creamy!
  • Parmesan cheese: Grated, for a savory and cheesy finish.
  • Salt and pepper: To taste.

How to Make Creamy Cajun Chicken Pasta


A plate full to show How to Make Creamy Cajun Chicken Pasta

This is where the fun begins! I used to feel intimidated by making pasta dishes from scratch, but this recipe couldn’t be easier. Here’s a quick breakdown:

  1. Season and cook the chicken: Coat bite-sized chicken pieces with Cajun seasoning, then sauté in a hot pan until golden and cooked through. Set aside.
  2. Sauté the veggies: Add a touch more oil to the pan and cook your garlic and bell peppers until they smell fantastic and start to soften.
  3. Build the sauce: Pour in the heavy cream, then toss in the grated Parmesan cheese. Stir everything until the cheese melts and you get a smooth, creamy sauce.
  4. Bring it together: Add the cooked pasta and cajun chicken to the sauce. Mix everything well, so the pasta is nice and coated. Taste and adjust seasoning if needed.
  5. Finish and enjoy: Serve hot, sprinkled with a little extra Parmesan and chopped green onions if you’re feeling fancy.

Tips for the Best Cajun Chicken Pasta

I’ve made this creamy Cajun pasta so many times, I’ve picked up a few tricks. Here’s how to take it from good to great:

  • Use freshly grated Parmesan. Pre-shredded cheese won’t melt as smoothly, so it’s worth a few extra minutes to grate it yourself.
  • Thin your sauce if needed. If the sauce feels too thick, add a splash of reserved pasta cooking water until it’s just right. This trick also helps the sauce stick to the pasta!
  • Don’t overcook your pasta. Aim for al dente, since it will cook a little more when combined with the sauce.
  • Adjust spice level. Prefer a mild dish? Use less Cajun seasoning or add more cream to take down the heat.

Frequently Asked Questions

Can I make this ahead of time?

Absolutely! This pasta reheats well, making it perfect for meal prep or lunch the next day. Just store in an airtight container in the fridge and gently reheat on the stove, adding a splash of cream or milk to loosen the sauce.

Can I use a different protein?

For sure! Swap out chicken for shrimp or even sausage if you’re looking for a new twist. You can also use rotisserie chicken for a super-fast dinner.

Is there a lighter option?

If you’re looking for a lighter version, try using half-and-half or even whole milk instead of heavy cream. The texture will be a bit less creamy, but still really tasty.

Serving Suggestions

This creamy Cajun chicken pasta is a meal all on its own, but you can take it over the top with a simple side. Try serving it with:

  • Garlic bread
  • A crisp green salad
  • Roasted vegetables

Gather everyone around the table and watch as this pasta disappears!

Final Thoughts: Why You Should Try This Easy Cajun Chicken Pasta

If you’re still on the fence, I get it—sometimes trying a new recipe can feel like a leap of faith. But this pasta is a guaranteed crowd-pleaser, bursting with flavors that’ll transport you straight to New Orleans (or at least make dinner more exciting!). 

Plus, the fact that it’s ready in less time than it takes for delivery makes it a lifesaver for busy nights.

The next time you crave comfort food with a little edge, remember this creamy Cajun chicken pasta recipe. Easy, quick, and bursting with bold flavor—it’s everything you want in a weeknight dinner. Give it a try, and let me know how it turns out in the comments below. What tweaks did you make to make it your own?

Happy cooking!

```

Instant Pot Zero Minute Chicken Recipe for Quick Weeknight Meals

`Ever get home after a long day and wish dinner could just cook itself? Your wish can almost come true if you've got an Instant Pot (or any electric pressure cooker). Today, 

I’m sharing one of my favorite hacks: the Instant Pot Zero Minute Chicken Recipe.

 Yes, you read that right—zero minutes! Quick, juicy chicken perfect for those busy weeknights when you don't have a minute to spare.


A pot full of nstant Pot Zero Minute Chicken Recipe for Quick Weeknight Meals


Why “Zero Minute” Chicken?

You might be asking yourself, what does zero-minute chicken even mean? Don’t worry, you’re not alone! The "zero minute" technique is a clever trick to add to your Instant Pot. 

You set the cook time to zero, and the magic happens as your electric pressure cooker comes up to pressure. During this time, the chicken gets cooked to perfection—tender and full of flavor without turning rubbery or overdone.

This method is a real lifesaver in my kitchen. It’s especially handy when you’re juggling so many things at once, whether it’s helping the kids with homework or just wanting to kick back after work. In less time than it takes to scroll social media, your chicken is ready!

What You’ll Need for Instant Pot Zero Minute Chicken

One of the best things about this recipe is its simplicity. You really don’t need much:

  • Chicken breasts or thighs (boneless or bone-in, even frozen works!)
  • Water, chicken broth, or stock
  • Basic seasonings: think salt, pepper, garlic powder, onion powder, or your favorite herbs

A pot full of chicken to show What You’ll Need for Instant Pot Zero Minute Chicken

That’s it! This recipe is incredibly versatile. I often use whatever I have on hand. Sometimes I’ll throw in a bay leaf or a sprig of thyme if I feel fancy, but honestly, the regular basics do the trick.

How to Make Instant Pot Zero Minute Chicken

Wondering how this works? Here's the easy step-by-step guide:

1. Add Your Chicken

Pop your raw chicken pieces into the Instant Pot. Whether it’s frozen or fresh, it works both ways. (Tip: This is perfect for those days you forgot to thaw dinner!)

2. Add Liquid

Pour about 1 cup of water, chicken broth, or stock over the chicken. This is super important—pressure cookers always need some liquid to work!

3. Sprinkle Seasonings

Sprinkle on your chosen seasonings. Don’t stress about exact measurements. Usually, a teaspoon or so of each gets the job done. You can always taste and adjust later, especially if you plan to shred the chicken and mix it into sauces or salads.

4. Set Cook Time to Zero

Here’s the magic part. Secure the lid, set your valve to “sealing,” and cook on high pressure for zero minutes. Yes, really! The Instant Pot will do all the work as it comes up to pressure. Once that happens, it beeps and moves to keep warm.

5. Natural Release

Let the pressure release naturally for about 5 minutes. After that, you can release the rest of the pressure manually. That's it! Open the lid and get ready to enjoy juicy, perfectly cooked chicken.

Tips for the Best Zero Minute Chicken

  • Cut Even Sizes: Try to cut your chicken into similar-sized pieces, so everything cooks evenly.
  • Don’t Skip the Natural Release: This short resting period helps the meat stay tender and juicy.
  • Play with Flavors: You can use taco seasoning, Italian herbs, or even a splash of soy sauce for a new twist every time.

If you want to make bigger batches for meal prep, simply double the recipe! Your Instant Pot will take a bit longer to come up to pressure, but no extra cook time is needed.

How to Use Your Zero Minute Chicken

A pot full of chicken to show How to Use Your Zero Minute Chicken

This chicken is amazing for meal prepping or tossing together quick dinners. Seriously, the possibilities are endless! Here are a few ideas to get you started:

  • Shred it for tacos, sandwiches, or salads
  • Slice it for easy wraps or rice bowls
  • Dice it and toss in pasta, stir-fries, or soups

I often make a batch at the beginning of the week and use it in everything from Caesar salads to last-minute chicken quesadillas. It’s a real lifesaver when hunger hits and there’s no time to cook from scratch.

Why the Instant Pot Is Perfect for Busy Nights

Let's face it, we all have those evenings when take-out sounds tempting just because it's quick. But with the Instant Pot, a wholesome homemade meal is just as fast. The pressure cooker’s unique way of cooking means that even frozen chicken goes straight from freezer to fork in about 15 minutes (including the pressure-up time).

What’s even better, the chicken stays moist and never dry. Compared to pan-cooking—where it’s so easy to overdo it—the Instant Pot takes out all the guesswork.

Common Questions About Zero Minute Chicken

1. Will my chicken really cook in zero minutes?

Absolutely! The cooking actually happens as the pot comes up to pressure. As long as you give it a few minutes of natural pressure release, your chicken will be fully cooked and juicy, not tough or dry.

2. Can I cook different cuts or frozen chicken?

Yes! This method works with breasts, thighs, tenders—boneless or bone-in. Just remember, size matters: bigger or bone-in pieces may need a bit more natural release time. Frozen chicken is no problem either. It will just take a little longer for the pot to build pressure.

3. Is this recipe healthy?

Definitely! Cooking with the Instant Pot lets you skip the extra oil and fat. You can easily make this recipe low-carb, keto-friendly, or gluten-free depending on your seasonings and what you serve with the chicken.

Make Dinner Stress-Free

Life can get crazy, but your weeknight dinners don’t have to be. With the Instant Pot Zero Minute Chicken Recipe, you can win at meal times—even on your busiest nights.

I remember a time when my daughter’s soccer practice ran late and I had nothing planned for dinner. I grabbed some chicken from the freezer, sprinkled on whatever seasonings I could find, and threw it all in the pressure cooker. By the time we changed out of our muddy shoes, dinner was ready—just like that! No thawing, no waiting, and no complaints at the table.

Try It Tonight!

If you’re looking for a healthy, quick, and easy chicken recipe that’ll save your sanity, give zero minute chicken a try. I bet it’ll become your new weeknight favorite, just like it is in our house.

Ready to make dinner magic? Let me know in the comments how it went or if you tried a fun seasoning blend—I'd love to hear your twist on this Instant Pot classic!

Pin or Bookmark for Later!

Don’t forget to save this Instant Pot Zero Minute Chicken Recipe—because some nights, you really don’t have a minute to spare.

How to Make Strawberry Pavlova: A Simple Step-by-Step Guide

If you've ever wanted to wow your family or guests with a show-stopping dessert, strawberry pavlova is a wonderful place to start.  Thi...