Disclaimer

This content was created with the help of AI
Showing posts with label Easy Meals. Show all posts

Saturday, May 3, 2025

5-Ingredient Vintage Recipes for Effortless Nostalgic Meals


A Vintage Cookbook for 5-Ingredient Vintage Recipes
IMAGE SOURCE


Do you ever find yourself craving the comforting flavors of meals from the past? Maybe it’s the scent of a casserole from your childhood or the thought of a creamy dessert your grandmother used to make. 

The good news is you don’t need an overflowing pantry or hours in the kitchen to whip up classic dishes. In fact, many vintage recipes use just a handful of ingredients—often five or less! 

In this blog post, we're diving into 5-ingredient vintage recipes that bring the taste of nostalgia to your table, with hardly any fuss.

Why Choose 5-Ingredient Vintage Recipes?

In our fast-paced world, simplicity is more than just a convenience—it’s a lifesaver. These fuss-free meals are perfect for busy families, beginner cooks, or anyone who enjoys the charm of old-fashioned cooking without the complication.

  • Quick preparation: Most of these recipes can be thrown together in minutes.
  • Budget-friendly: Fewer ingredients mean less grocery shopping and more savings.
  • No-fuss ingredients: You probably already have most of these items in your kitchen.
  • Nostalgic flavors: They remind us of simpler times, family gatherings, and handwritten recipe cards.

If you’re like me, sometimes you just want a dish that’s comforting, delicious, and doesn’t require an entire afternoon or a chef’s degree. 

So, let’s take a walk down memory lane and discover some vintage recipes with only five ingredients!

Classic 5-Ingredient Vintage Recipes

A plate of Porcupine Meatballs
IMAGE SOURCE


1. Porcupine Meatballs

Don’t let the name fool you—there are no porcupines involved here! These hearty meatballs got their quirky name from the rice that pokes out like spines. The recipe is as easy as it is delicious:

  • Ground beef
  • Uncooked white rice
  • Onion
  • Canned tomato soup
  • Water

Mix it all up, shape into balls, add the soup and water, then simmer. Before you know it, you have a homestyle meal that’s both filling and friendly for your wallet. 

My grandmother would always serve these on a chilly day—they’re like a warm hug in a bowl!

2. Magic Peach Cobbler

Who doesn’t love a dessert that almost makes itself? This vintage recipe is from a time when convenience and flavor were equally important. You only need:

  • Canned peaches
  • Sugar
  • Flour
  • Butter
  • Baking powder

Simply layer the ingredients in a baking dish and let the oven do the rest. The result? A golden, bubbling cobbler that’s best enjoyed warm, maybe with a scoop of ice cream. 

This is a staple at family potlucks in my hometown, and it disappears fast!

3. Chicken and Rice Casserole


One-pan wonders have been saving dinner tables for decades. This simple casserole calls for:

  • Chicken breasts or thighs
  • Uncooked rice
  • Canned cream of mushroom soup
  • Water
  • Soup mix (like onion soup)

Just mix, bake, and let the magic happen. The rice absorbs the savory flavors, resulting in a creamy, cozy dish that’s equal parts retro and delicious. Have picky eaters at home? This recipe is sure to win them over.

4. Salmon Patties


Canned salmon was once a pantry staple, especially when fresh meat wasn’t always easy to come by. To whip up a batch of salmon patties, you need:

  • Canned salmon
  • Breadcrumbs or crushed crackers
  • Egg
  • Onion
  • Salt and pepper (ok, two seasonings—does that count?)

Shape into patties and pan-fry until golden. These pair perfectly with a simple side salad or a pile of mashed potatoes. 

They remind me of the lunches my mom made—quick, filling, and surprisingly tasty for such a humble dish!

5. Tomato Soup Cake


This one always raises some eyebrows but trust me—don’t knock it until you try it! Tomato soup cake uses:

  • Canned tomato soup
  • Sugar
  • Flour
  • Baking soda
  • Spices (like cinnamon or nutmeg)

The tomato soup gives the cake a tender texture and subtle flavor that blends beautifully with warm spices. Dust with powdered sugar or add a simple glaze for a retro treat that’s sure to surprise your guests!

Tips for Success with Vintage Recipes

Wondering how to make the most of your 5-ingredient vintage recipes? Here are a few tips and tricks to make your cooking experience even better:

  • Choose quality ingredients: With fewer ingredients, quality makes a big difference.
  • Don’t overthink it: Vintage recipes are meant to be simple. Embrace the ease!
  • Feel free to adapt: If you’re missing an item or want to swap in your own twist, go for it!
  • Add your flair: Garnish with fresh herbs, serve with your favorite side, or add a little cheese for extra comfort.

Why Do We Love Nostalgic, Simple Meals?

There’s a reason these easy vintage recipes have stuck around. For many, they bring back memories of childhood meals and family gatherings. They remind us that comfort food doesn’t have to be fancy. 

Plus, in a world filled with ever-changing food trends, there’s something refreshing about going back to basics.

Sometimes, a simple dish like chicken and rice casserole or warm peach cobbler just feels right. It’s like pressing the pause button on a busy day and savoring the little joys in life.

Get Cooking!

Ready to add a dose of nostalgia to your meal plan? These 5-ingredient vintage recipes are proof that great flavor doesn’t require a long list of ingredients or fancy techniques. 

So, the next time you need a quick dinner, a comforting dessert, or just want to relive the good old days, give one of these classics a try. 

Who knows? You might find a new family favorite.

Which vintage recipe do you want to try first? Let us know in the comments—or share your own favorite retro dish! 

Happy cooking, and here’s to simple, delicious food that never goes out of style.

Top 5-Ingredient Dishes Recommended by Allrecipes Allstars


Ever found yourself staring into the fridge, wondering, “What can I make with just a few things?” If so, you’re not alone! Many of us want quick, delicious meals without a long grocery list. 

That’s why I’m excited to share these top 5-ingredient dishes, handpicked by the Allrecipes Allstars. 

These recipes prove that you don’t need a pantry full of fancy ingredients to whip up a fantastic meal. Ready to find out which simple recipes made the cut?

Why Choose 5-Ingredient Recipes?

Let’s be honest: life gets busy. On those hectic days, the last thing any of us wants is to juggle 15 different ingredients just to make dinner. 

That’s where 5-ingredient recipes become lifesavers! They’re:

  • Quick to prepare
  • Budget-friendly
  • Perfect for busy weeknights
  • Great for beginner cooks

Does that all sound like a dream? If you’re nodding your head, these recipes are just what you need in your kitchen arsenal.

Allrecipes Allstars: Who Are They?

You may be wondering, “Who are the Allrecipes Allstars?” They’re a group of passionate home cooks who put recipes to the test before sharing their top picks. Think of them like the trusted neighbor you ask for recipe advice. 

Their recommendations come from real experience, so you know their 5-ingredient dishes are both practical and mouthwatering.

The Best 5-Ingredient Dishes to Try

Ready to simplify dinner time? Here are the top 5-ingredient dishes recommended by Allrecipes Allstars. These meals are proof that less can truly be more in the kitchen!

1. Slow Cooker Salsa Chicken


This recipe is a game changer for anyone who loves bold flavors but hates fuss. With only a handful of ingredients, you can make a crowd-pleasing dinner even on your busiest days.

  • Chicken breasts
  • Salsa (pick your favorite kind!)
  • Taco seasoning
  • Corn
  • Black beans

The best part? All you do is toss everything into a slow cooker. A few hours later, you’ll have juicy, flavorful chicken that’s perfect in tacos, over rice, or even on top of a fresh salad. Isn’t it amazing how something so simple can taste so good?

2. Easy Baked Ziti


If you love cheesy, comforting pasta, this one will become your new go-to. There’s something magical about a bubbling dish of pasta straight from the oven.

  • Ziti pasta
  • Marinara sauce
  • Ricotta cheese
  • Mozzarella cheese
  • Parmesan cheese

Mix, layer, bake, and enjoy! It’s just like Mama used to make—without all the extra steps. Plus, this baked ziti is perfect for feeding a crowd or saving leftovers for lunch. Who else loves meals that taste even better the next day?

3. 5-Ingredient Asian Peanut Noodles

Craving takeout but want to keep things healthy and simple? These Asian Peanut Noodles are faster than delivery and just as delicious!

  • Pasta or noodles of your choice
  • Peanut butter
  • Soy sauce
  • Honey
  • Sriracha (for a bit of heat)

I remember the first time I tried making peanut sauce at home—I was surprised by how easy it was! This dish is perfect when you want something a little different, and you can toss in leftover veggies or chicken if you like. It’s like treating yourself to an exotic meal, right from your own kitchen. 

Speaking of easy swaps, have you ever tried almond butter instead of peanut butter? It works just as well.

4. Lemony Grilled Salmon

Looking for a healthy dinner that doesn’t taste boring? Lemony Grilled Salmon checks all the boxes. It’s fresh, flavorful, and super-fast to make!

  • Salmon fillets
  • Lemon
  • Olive oil
  • Salt
  • Pepper

You simply brush the salmon with oil, sprinkle with salt and pepper, and grill until perfection. A squeeze of lemon brightens up every bite. I love serving this salmon alongside simple roasted veggies or a crisp green salad. Quick tip: if you’re short on time, you can bake it instead of grilling!

5. Classic Sheet Pan Sausage and Veggies


One-pan meals are a lifesaver on busy nights, aren’t they? This classic sausage and veggies combo is colorful, flavorful, and requires almost zero cleanup.
  • Smoked sausage
  • Bell peppers
  • Red onion
  • Olive oil
  • Seasoning blend (choose your favorite!)

Just slice everything up, toss with oil and spices, and roast on a sheet pan. Dinner is done in under an hour, with hardly any dishes to wash. 

Personally, I love adding a pinch of Italian seasoning for extra flavor. What’s your favorite spice blend for roasting?

Tips for Making 5-Ingredient Meals Work for You

Different color bell peppers for Making 5-Ingredient Meals
IMAGE SOURCE

  • Stock your pantry. Keep versatile ingredients like olive oil, pasta, canned beans, and rice on hand. It makes putting meals together so much easier.
  • Double up on produce. Use leftovers in salads, wraps, or omelets the next day.
  • Don’t be afraid to swap ingredients. If you don’t have black beans for the salsa chicken, try pinto beans instead.
  • Taste as you go. With fewer ingredients, seasoning is extra important. Add a pinch of salt or a squeeze of lemon to make flavors pop.

Why Simple Recipes Are Here to Stay

More of us are realizing that simple doesn’t mean boring. With just five ingredients, you can prepare meals that taste amazing and save you time. 

Plus, these recipes are flexible. Swap out what you have, adjust flavors, and make them your own. Isn’t that what home cooking being all about?

Get Cooking!

Which of these 5-ingredient dishes will you try first? Sometimes, just seeing how easy a recipe is can inspire you to get into the kitchen and start cooking. 

The next time you’re tempted to order takeout or feel overwhelmed by dinner, remember simplicity is your secret weapon. 

For more easy recipes and quick dinner ideas, check back often—we love sharing ways to make home cooking stress-free and fun.

Let us know in the comments: What’s your favorite 5-ingredient recipe?


Why Basic Crepes Are Allrecipes’ Most-Saved Brunch Recipe

When it comes to brunch, we all have our favorites. Maybe you’re a pancake lover. Maybe French toast calls your name. 

But there’s one recipe that’s won the heart—and bookmarks—of home cooks everywhere: the simple, delicious basic crepe

According to Allrecipes, their basic crepes recipe is the most-saved brunch recipe on their entire site. Want to know why? Let’s dive in!

Why Basic Crepes Are Allrecipes’ Most-Saved Brunch Recipe


What Are Crepes, Anyway?

Let’s keep it simple. Crepes are like the delicate, European cousins of your everyday pancakes. They’re thinner, softer, and can be filled or topped with just about anything your heart desires. 

Imagine a pancake rolled up like a burrito, but with endless possibilities—sweet or savory. Pretty versatile, right?

Why Are Basic Crepes So Popular?


Ever wonder why some recipes go viral while others fizzle out? When it comes to brunch recipes, crepes have a few tricks up their sleeve that keep folks coming back to their mixing bowls again and again. 

Here’s what makes them a must-have:

  • Simple Ingredients: You probably already have what you need in your kitchen—flour, eggs, milk, butter, and a pinch of salt.
  • Quick to Make: No oven needed, and they cook up in just a couple of minutes per crepe.
  • Customizable: Want something sweet? Reach for fruit, Nutella, or powdered sugar. Craving savory? Go for ham, cheese, or fresh veggies.
  • Freezer Friendly: Make a big batch and stash some in the freezer for those busy mornings.

Honestly, when my family visited Paris on vacation, crepes were everywhere. Don’t you just love street food that’s portable and fun? 

Best of all, you don’t need a plane ticket to enjoy a delicious crepe. With a basic crepe's recipe, you can bring that magic right to your own kitchen.

The Simple Crepe Recipe That Wins Hearts

You won’t find fans just in France—Americans adore crepes too! The top-rated Allrecipes crepe recipe is famous for one big reason: it’s foolproof

Even total beginners can whip up a batch. There’s no mystery or special equipment. If you have a nonstick skillet, you’re set.

Here’s what makes this basic crepes recipe stand out:

  • No fancy ingredients or steps, which means less stress in the kitchen.
  • Easy techniques—just whisk, pour, flip, and fill.
  • Flexible for families: picky kids, vegetarians, and anyone in between will find something to love.

Ingredients You Probably Already Have

One of the reasons this easy crepes recipe is a brunch legend? The ingredient list is short and sweet. You just need:

  • Flour
  • Eggs
  • Milk
  • Melted butter
  • Salt

Bonus tip: Some people add a splash of vanilla or a spoonful of sugar for extra flavor, but you don’t have to.

How to Make Basic Crepes at Home (Step by Step)


Feeling nervous about making crepes? Don’t be! If you can make pancakes, you can make crepes. Here’s the basic method:

  1. Make the batter: Whisk together flour, eggs, milk, melted butter, and salt. Mix until smooth. Some folks let the batter sit for half an hour for extra tenderness, but it’s not required.
  2. Heat your pan: A nonstick skillet works best. Add a thin layer of melted butter or oil.
  3. Pour and swirl: Add a little batter and quickly tilt the pan to coat the surface. Think of it like painting the bottom with a thin layer.
  4. Cook: Let the crepe set for about a minute, then gently flip with a spatula and cook the other side.
  5. Fill or top: Go wild—fresh berries, whipped cream, ham and Swiss, or even just a squeeze of lemon and a dusting of powdered sugar.

When I first made crepes, I worried they’d stick or tear. Truth is, the first one isn’t always perfect—think of it as the “test pancake.” After that, it gets smoother (literally!).

The Secret to Brunch Success: Customization

The real reason crepes win at brunch? Everyone can make them their own. Want to serve a crowd? Set out bowls of favorite fillings and let people build their dream crepe. 

It’s like taco night, but fancier! And way more flexible than making stacks of pancakes to order.

  • Sweet classics: Strawberries and cream, Nutella and bananas, maple syrup, or cinnamon sugar.
  • Savory favorites: Sautéed mushrooms, ham and cheese, spinach and feta, or smoked salmon and cream cheese.

In my family, Sunday morning is “make-your-own-crepe day.” We set everything out, and even the picky eaters dig in. It’s a fun, hands-on way to kick off the weekend.

Tips for Crepe-Making Success

Here are a few tricks to make your basic crepes perfect every time:

  • Don’t overload the pan. Aim for a thin, even layer so your crepe is flexible, not floppy.
  • Let the batter rest if you have time—it helps the flour absorb the liquid and makes the crepes tender.
  • Adjust the heat. Medium is key; too hot, and the crepes will crisp instead of stay soft.
  • Use a nonstick pan. This is really the secret weapon for stress-free flipping.
  • Don’t stress about perfection. Even if a crepe tears, just fold it up and enjoy. It’ll still taste heavenly!

Why Basic Crepes Should Be Your Brunch Go-To

Why Basic Crepes Should Be Your Brunch Go-To

In the end, the basic crepes recipe is the most saved for a reason. It’s reliable, quick, and so versatile. Whether you want something simple or decide to get fancy, crepes have your back. 

Plus, who doesn’t love a breakfast or brunch that feels special, without making you work too hard?

Looking for a new tradition, or just want to impress guests (or yourself) with little effort? Give crepes a try. 

Once you get the hang of it, you’ll see why this recipe is a star in kitchens all over the world.

Ready to Make the Most-Saved Brunch Recipe?

So, are you inspired to flip your own batch of crepes? You don’t need to be a chef. Just grab a whisk, raid your fridge, and let your creativity take over. 

Before you know it, you’ll understand exactly why this basic crepe recipe keeps winning hearts—and bookmarks—everywhere.

Start simple, have fun, and most importantly: don’t wait for a special occasion to enjoy homemade crepes. Happy brunching!


Wednesday, April 30, 2025

Easy Cream Cheese Chicken Enchiladas Recipe

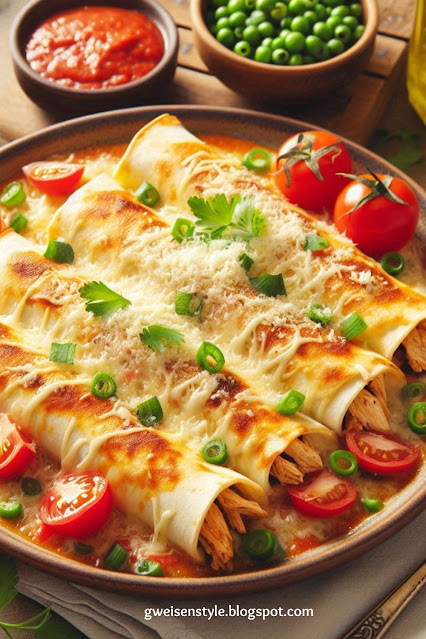
Looking for a comforting meal that’s perfect for busy weeknights? You’re in the right place! This Easy Cream Cheese Chicken Enchiladas Recipe brings creamy, cheesy goodness together with tender chicken, wrapped in a soft tortilla. 

Whether you’re feeding your family or hosting friends, these enchiladas always hit the spot.


A plate of Easy Cream Cheese Chicken Enchiladas Recipe


Why You’ll Love These Cream Cheese Chicken Enchiladas

If you love easy chicken recipes or crave Mexican-inspired comfort food, this dish is about to become a staple at your dinner table. I remember making these enchiladas after a long day, and the smiles around the table made every step worth it. They’re simple, satisfying, and full of flavor. Plus, the creamy filling is pure comfort on a plate!

  • Quick to prepare – only 15 minutes of prep time!
  • Kid-friendly – little ones love the cheesy, mild flavors.
  • Perfect for leftovers – these enchiladas reheat beautifully.
  • Freezer-friendly – meal prep just got easier.

What Are Cream Cheese Chicken Enchiladas?


A pan full of cream cheese and chicken to show What Are Cream Cheese Chicken Enchiladas?

If you’ve never tried enchiladas with cream cheese before, you’re in for a treat! Think of it as the best of two worlds: creamy chicken filling wrapped in warm tortillas and baked with tangy enchilada sauce and gooey melted cheese. It’s like a hug on a plate.

Enchiladas are a classic Mexican dish made with filled tortillas topped with sauce and cheese. The twist in this recipe comes from the addition of cream cheese, which makes the filling extra rich and satisfying.

Ingredients You’ll Need

The beauty of this recipe is its simplicity. Most ingredients are probably already in your fridge or pantry! Here’s what you’ll need:

  • Cooked chicken (rotisserie or leftover chicken works well)
  • Cream cheese – softened to room temperature
  • Sour cream
  • Shredded cheese (cheddar or a Tex-Mex blend)
  • Enchilada sauce (store-bought or homemade)
  • Flour tortillas (medium size, about 8-inch)
  • Chopped green onions
  • Salt, pepper, and any favorite seasonings

Got leftover chicken or veggies? Toss them in – this recipe is super flexible.

Step-by-Step: How to Make Cream Cheese Chicken Enchiladas

A plate full of chicken enchiladas with all the trimmings to show How to Make Cream Cheese Chicken Enchiladas

Let’s walk through the process. You’ll be surprised how quickly this dinner comes together!

1. Prep the Filling

In a large mixing bowl, combine shredded chicken, softened cream cheese, sour cream, a little of your shredded cheese, chopped green onions, and seasonings. Stir until everything is evenly mixed. The cream cheese should melt together with the chicken, making a creamy, dreamy filling. (Tip: Warm the cream cheese a bit to make mixing easy!)

2. Fill the Tortillas

Spoon the chicken mixture into the center of each tortilla. Don’t overfill – about 1/3 cup per tortilla will do the trick. Roll them up and place seam-side down in your baking dish. It’s a bit like wrapping a present, only tastier.

3. Pour & Sprinkle

Pour enchilada sauce over the rolled tortillas. Sprinkle a generous amount of cheese on top. The more cheese, the better if you ask me!

4. Bake

Bake at 350°F (175°C) for about 25-30 minutes. You want the cheese to be bubbly and golden brown. Your kitchen will smell amazing – be warned, this might bring curious family members into the kitchen!

5. Serve & Enjoy

Let the enchiladas cool for a few minutes, then serve. I love to top mine with extra green onions, a spoonful of salsa, or even a dollop of sour cream. What toppings do you love?

Tips for the Best Chicken Enchiladas

  • Use rotisserie chicken for a big shortcut and tons of flavor.
  • Soften cream cheese before mixing to avoid lumps.
  • Warm tortillas briefly so they’re easier to roll and less likely to tear.
  • If you want to add extra veggies, try corn, bell peppers, or black beans.
  • Spice it up – add jalapenos or a pinch of chili powder for heat!

Make-Ahead and Freezer Instructions

This recipe is a meal prep superstar! Here’s how to make your busy weeknights even easier:

  • Make ahead: Assemble the enchiladas and store, covered, in the fridge up to 24 hours before baking. Perfect for prepping in the morning and baking at dinnertime!
  • Freeze: Place assembled (unbaked) enchiladas in a freezer-safe dish and freeze for up to 3 months. Bake straight from the freezer, just add 10-15 more minutes to the bake time.
  • Leftover magic: Reheat leftovers in the microwave or oven. They taste just as good the next day!

What to Serve with Cream Cheese Chicken Enchiladas

A plate with chicken enchiladas with rice, black beans and corn to show What to Serve with Cream Cheese Chicken Enchiladas?

While these enchiladas are a meal by themselves, sometimes you want a little something on the side. Here are my favorites:

  • Spanish rice or cilantro-lime rice
  • Black beans or refried beans
  • Fresh salad with tomatoes and avocado
  • Tortilla chips with salsa or guacamole
  • Corn on the cob or elote (Mexican street corn)

Mix and match, or keep it simple – either way, you can’t go wrong.

Frequently Asked Questions

Can I use corn tortillas instead of flour?

Of course! If you prefer a gluten-free option, corn tortillas work well. Just warm them first to prevent cracking.

Can I make this dish vegetarian?

Absolutely! Swap the chicken for roasted veggies or black beans, and you’ll still have a creamy, cheesy delight.

How spicy is this recipe?

This dish is mild, making it family-friendly. Want more heat? Add extra chili powder or use a spicy enchilada sauce.

What’s the best way to shred chicken?

Two forks do the job, but my quick tip: use a stand mixer! It shreds warm chicken in seconds.

Try This Cream Cheese Chicken Enchiladas Recipe Tonight!

Ready to shake up your dinner routine? These easy Cream Cheese Chicken Enchiladas are the answer. With simple ingredients, easy prep, and comforting flavors, they’ll quickly earn a spot in your family’s favorites.

Leave a comment below if you try them and share your favorite enchilada twists! What other family-friendly dinners would you like to see next?

If you love easy chicken recipes, don’t forget to check out my Slow Cooker Chicken Tacos or One Pan Chicken and Rice for more crowd-pleasing ideas!

```

Thursday, April 24, 2025

Easy Sheet Pan Salmon Recipe for Healthy Weeknight Dinners

Are you looking for a quick, healthy dinner that your whole family will love? Look no further! This easy sheet pan salmon recipe checks every box. 

Not only is it packed with flavor, but it's also super simple to prepare – just toss everything onto one pan, bake, and dinner’s ready.

If you’ve ever found yourself staring into your refrigerator wondering, “What should I cook tonight?” you’re not alone. Between work, school, and everything else on our plates, making a nutritious meal during a busy weeknight can feel like an impossible task. 

But don’t worry – sheet pan dinners are here to save the day.

Salmon on a sheet pan with brocolli and lemon wedges to showcase asy Sheet Pan Salmon Recipe for Healthy Weeknight Dinners

Why You’ll Love Sheet Pan Salmon

Let’s face it. Cleaning up after dinner can sometimes be the hardest part of cooking. But with this sheet pan salmon recipe, you only have one pan to wash. Isn’t that music to your ears? And the best part: the whole meal comes together in under 30 minutes.

  • Healthy and Nutritious: Loaded with omega-3-rich salmon and colorful veggies.
  • Timesaving: Prep and cleanup are a breeze.
  • Family-friendly: Even picky eaters will find something to love.
  • Customizable: Easily swap out veggies or seasonings based on what you have on hand.

The Magic of Sheet Pan Dinners

Think about sheet pan meals as your kitchen’s shortcut to flavor and convenience. Instead of juggling multiple pots on the stove, everything cooks together in the oven. The salmon comes out juicy and flaky, while the veggies are perfectly roasted and seasoned. It’s like hitting the “easy button” for dinner!

Does Salmon Really Taste Good Cooked This Way?

Absolutely! Roasting salmon on a sheet pan keeps it moist and tender. The natural juices from the fish blend with whatever veggies you use, creating an irresistible flavor. My family couldn’t believe how tasty roasted salmon can be the first time I tried this method. If you think fish is bland or tricky to cook, you’re in for a pleasant surprise.

Key Ingredients for Sheet Pan Salmon

You only need a few simple ingredients for this healthy weeknight dinner:

  • Fresh Salmon Fillets: Choose skin-on or skinless, and look for vibrant, pink flesh.
  • Seasonal Vegetables: Bell peppers, red onion, cherry tomatoes, zucchini, or asparagus all work well.
  • Lemon Slices: For a burst of freshness.
  • Olive Oil & Simple Spices: Garlic, salt, pepper, paprika, and a little dried herb like oregano or thyme.

Don’t have all these on hand? No worries! Feel free to use whatever veggies or spices you love. The recipe is incredibly flexible – just like your favorite pair of jeans.

How to Make Easy Sheet Pan Salmon

Woman in kitchen preparing How to Make Easy Sheet Pan Salmon

This recipe is as straightforward as it gets. Even if you’re new to cooking, you can nail it on the first try. Let’s break it down step-by-step:

  1. Prep Your Veggies
    Chop your vegetables into even-sized pieces. This helps everything cook at the same rate. Spread them out on a large sheet pan in a single layer.
  2. Season Everything
    Drizzle olive oil over the veggies and sprinkle with salt, pepper, and your favorite seasonings. Mix to coat.
  3. Add the Salmon
    Place the salmon fillets on top of the vegetables. If you’re a fan of crispy salmon skin, put it skin side down. Add a light drizzle of olive oil and another sprinkle of seasoning. Top each fillet with a lemon slice.
  4. Bake to Perfection
    Pop the sheet pans into a preheated oven at 400°F (200°C). Bake for 12-15 minutes or until the salmon is just opaque and flakes easily with a fork. That’s it!

One of my kids likes salmon best with a little bit of honey drizzled on top – so don’t be afraid to experiment! That’s the beauty of home cooking.

Easy Sheet Pan Salmon Tips & Variations

  • Use What You Have: Swap in broccoli, carrots, or green beans if you don’t have the veggies listed above.
  • Make It Spicy: Add a pinch of chili flakes or a squeeze of sriracha for a kick.
  • Mix Up Your Herbs: Dill, parsley, or basil are all delicious options for salmon.
  • Try Different Citrus: Limes or oranges bring their own unique twist.
  • Add Starch: Toss small potatoes or sweet potato chunks on the pan for a more filling meal.

Don’t be afraid to play chef. Sheet pan recipes are very forgiving, so feel free to get creative!

Serving Suggestions


A plate with Salmon, brocolli and rice in kitchen counter for Serving Suggestions


Wondering what to serve with your sheet pan salmon? Here are a few ideas:

  • Steamed Rice: A classic side that soaks up all the tasty juices.
  • Crusty Bread: Perfect for sopping up the lemony olive oil left on the pan.
  • Simple Green Salad: For extra crunch and freshness.

If you’re feeding a crowd, just add more salmon and veggies – no need for extra pans. This meal scales up beautifully.

Why Sheet Pan Salmon is the Healthy Choice

Salmon isn’t just delicious; it’s also one of the healthiest protein options out there. It’s packed with omega-3 fatty acids, which are good for your heart and brain. Plus, roasted vegetables are full of fiber, vitamins, and minerals. It’s a meal that makes you feel as good as it tastes.

And the best part? Kids love it!

One night, my picky eater declared that salmon was “just like chicken but better.” Who knew? Sometimes the simplest meals are the biggest hits.

Frequently Asked Questions

How do you know when salmon is done?

Salmon is ready when it’s opaque and flakes easily with a fork. If you have a food thermometer, look for an internal temperature of 145°F (63°C).

Can I use frozen salmon?

Yes, but let it thaw first and pat dry before baking. This helps it cook evenly and prevents excess moisture on your pan.

What if my veggies aren’t cooked by the time the salmon is done?

Cut your veggies into smaller pieces or give them a head start in the oven for 10 minutes before adding the salmon.

Final Thoughts – Give Sheet Pan Salmon a Try!


Vegetables on the table to use for Easy Stheet Pan Salmon Recipe

Easy, healthy, and full of flavor – this sheet pan salmon recipe is a total weeknight winner. With only a handful of ingredients and minimal cleanup, you’ll have more time to relax after dinner. Next time you’re stuck in a dinner rut, remember all you need is one pan and a little imagination.

Ready to make your weeknights easier and tastier? Grab some fresh salmon, your favorite veggies, and try this sheet pan salmon recipe.

 Let me know what creative combos you come up with – dinner inspiration is always welcome!

```

Easy Air Fryer Garlic Bread Recipe Ready in Minutes

Easy Air Fryer Garlic Bread Recipe Ready in Minutes

Have you ever craved golden, buttery garlic bread but didn’t want to turn on the oven or wait ages for it to toast? 

What if I told you that you could whip up irresistible, crispy garlic bread in under 10 minutes—no oven required? Yes, it’s true! 

Thanks to the air fryer, this classic side dish is easier and quicker than ever. Today, I’m sharing my favorite easy air fryer garlic bread recipe that will have your kitchen smelling amazing and your taste buds oh-so-happy.

An air fryer full of Garlic Bread for Easy Air Fryer Garlic Bread Recipe Ready in Minutes

Why Make Garlic Bread in the Air Fryer?

Let’s face it: Traditional garlic bread can take a while to prepare. You might preheat the oven, arrange the bread, and then wait another 10-15 minutes for it to crisp up. Meanwhile, you’re left wishing you could just dig in. 

That’s where the air fryer comes in! Here are a few reasons why you should make garlic bread in your air fryer:

  • Speed: Cooks in just 4-5 minutes, perfect for busy nights!
  • Even crispiness: The hot circulating air ensures every piece is perfectly browned.
  • No need to heat the oven: Especially great when you don’t want to warm up your whole kitchen.
  • Simple cleanup: Less mess, fewer dishes, more time to relax.

I remember the first time I tried making garlic bread in my air fryer. Honestly, I was skeptical. Could it really be that good? One bite was all it took—I was hooked! The edges were crunchy, the inside soft, and the flavor out of this world. Now, it’s my go-to method every time.

The Secret to Perfect Air Fryer Garlic Bread

Garlic in air fryer sitting on the cutting board to showcase The Secret to Perfect Air Fryer Garlic Bread

What makes this garlic bread so special? It all starts with a good foundation and a few simple ingredients. Here’s what you’ll need:

  • Bread: French baguette or Italian loaf gives the best results. Try sourdough for extra tang!
  • Butter: Real, unsalted butter for that rich, creamy flavor.
  • Garlic: Fresh garlic packs the most punch.
  • Parsley: Fresh or dried—this adds a lovely color and a hint of herbiness.
  • Salt: A touch brings all the flavors together.
  • Grated parmesan (optional): Cheese lovers, this step’s for you!

It’s amazing—such simple staples, yet together they create something truly unforgettable. If you want to keep it vegan, just opt for dairy-free butter and skip the cheese.

Making the Garlic Butter Spread


This is where the magic happens. Melt your butter, then stir in minced garlic, parsley, and salt. If you’re a cheese fan, add a sprinkle of parmesan. I always say, “Don’t hold back on the garlic!” The more, the merrier. If you like things zesty, a pinch of your favorite Italian herbs works great too.

How to Make Garlic Bread in the Air Fryer – Step by Step

Ready to get started? Here’s how to make this easy air fryer garlic bread from scratch:

  • 1. Prepare your bread: Slice your baguette or loaf into ½-inch thick pieces. Not too thick, not too thin—just right to hold your buttery spread without getting soggy.
  • 2. Mix the garlic butter: In a bowl, combine the softened butter, garlic, parsley, and salt. Mix until it’s nice and even.
  • 3. Spread it on: Generously slather the butter mixture onto each bread slice. Trust me, the more you use, the better!
  • 4. Cook in the air fryer: Arrange the slices in a single layer in your air fryer basket. Don’t overcrowd—if needed, work in batches.
  • 5. Air fry at 350°F (175°C): Let them cook for 4-5 minutes or until golden and crispy. Keep a close eye, as every air fryer is a bit different.
  • 6. Serve hot: Enjoy your garlic bread straight from the basket, warm and toasty!

Want it extra crispy? Add 1-2 more minutes—but don’t step away, or they might toast up faster than you expect!

Tips and Tricks for Air Fryer Garlic Bread Success

Making garlic bread is simple, but a few tricks can take your game to the next level:

  • Use day-old bread: Slightly stale bread holds up better and gets extra crunchy.
  • Soften (not melt) butter: Room temperature butter blends easier with garlic and spreads more evenly.
  • Don’t overcrowd: Proper air circulation is key for crispiness.
  • Customize: Add chili flakes for heat or swap parsley for basil if you’re in the mood.

I love experimenting with extra toppings. Some days, I’ll toss on a bit of mozzarella before air frying for cheesy garlic bread. Have picky eaters at home? Let them choose and add their favorite herbs. Cooking should always be fun!

What to Serve with Air Fryer Garlic Bread


Garlic bread is so versatile. It goes beyond just spaghetti! Here are some ideas to round out your meal:

  • With Pasta: Classic choice—think fettuccine alfredo, spaghetti bolognese, or creamy penne.
  • With Soup: Dunk it in tomato soup, minestrone, or chicken noodle for cozy comfort.
  • Alongside Salad: Pair with Caesar, caprese, or a simple green salad for a lighter meal.
  • As a Snack: Honestly, sometimes I make garlic bread just for a mid-afternoon treat!

Leftovers? Pop them back in the air fryer for one minute to re-crisp—they’ll taste freshly made every time.

Frequently Asked Questions

Can I use store-bought garlic bread in the air fryer?

Absolutely! Store-bought frozen garlic bread cooks up beautifully in the air fryer. Just follow the same temperature and check at the 4-5 minute mark. It’s a fantastic time-saver!

How should I store leftover garlic bread?

Wrap your leftover garlic bread in foil or an airtight container and refrigerate for up to 2 days. To reheat, pop it back in the air fryer for 1-2 minutes. Good as new!

What kind of butter works best?

Unsalted butter lets you control the salt level, but salted works if that’s all you have. For a lighter option, try a blend of butter and olive oil.

Final Thoughts—Why You’ll Love Air Fryer Garlic Bread

If you’ve ever wanted fresh, crispy garlic bread in a flash, the air fryer is your new best friend. It’s fast, it’s simple, and the taste is out of this world. Whether you’re making dinner for the family or just want a quick snack, this recipe is sure to please. I promise, after you try air fryer garlic bread, you’ll wonder how you ever lived without it.

So, what are you waiting for? Grab your ingredients, preheat that air fryer, and let’s turn an ordinary loaf of bread into an extraordinary treat. Your next meal is about to be so much tastier!

Have you tried air fryer garlic bread? Share your favorite variations or tell us how it turned out in the comments below!

```

Tuesday, April 22, 2025

Easy Instant Pot Duo Crisp Tortilla Pizza Recipe at Home

Have you ever craved pizza but didn’t want to deal with making dough, turning on the oven, or cleaning up a big mess? If so, you’re in for a treat! 

Today, I’m sharing how you can whip up a delicious tortilla pizza in your Instant Pot Duo Crisp—and trust me, it’s just as satisfying as anything you’ll find at your local pizzeria. 

Whether you’re a busy parent, a student, or just someone searching for a fun, easy meal, this recipe is a game-changer for your dinner plans.


A crisp tortilla sitting on a cutting board showing an Easy Instant Pot Duo Crisp Tortilla Pizza Recipe at Home

Why Tortilla Pizza Is the Ultimate Easy Meal

Let’s be real—a classic pizza can be a project. You’ll need to knead the dough, wait for it to rise, preheat the oven, and clean up all that flour. That’s great for a weekend, but sometimes you want that pizza flavor in a fraction of the time.

That’s where the Instant Pot Duo Crisp tortilla pizza comes in! By using flour tortillas instead of pizza dough, you cut down your prep time to just a few minutes. Plus, the Instant Pot Duo Crisp’s air fryer lid gets the tortilla perfectly crispy without heating up your kitchen.

What Makes the Instant Pot Duo Crisp So Special?

If you own an Instant Pot Duo Crisp, you already know it’s more than just a pressure cooker—it’s a total kitchen powerhouse. With the air fryer lid, you can get foods golden and crispy. And when it comes to pizza, that means you get a crunchy crust and melted cheese in less time than it takes to scroll through your take-out app.

Ingredients You’ll Need

One of my favorite things about this recipe is how customizable it is. Here’s a basic list, but feel free to get creative:

  • Flour tortillas (the larger, “wrap size” works best, but any size is fine)
  • Tomato sauce or pizza sauce
  • Shredded cheese (like mozzarella or a blend)
  • Your favorite toppings (pepperoni, mushrooms, peppers, olives, ham, pineapple—anything goes!)
  • Olive oil (optional, for a crispier crust)
  • Italian seasoning or dried oregano (optional, but it gives that classic pizza flavor!)

That’s it! For me, the best part is being able to use whatever is in the fridge—those last bits of cheese or leftover veggies suddenly become a delicious meal.

How to Make Tortilla Pizza in the Instant Pot Duo Crisp

An image of a Easy Instant Pot Duo Crisp Tortilla Pizza Recipe

Ready to get started? Let me break down the steps so anyone can follow along—even if you’re a complete kitchen newbie:

Step 1: Set Up Your Instant Pot

Begin by putting the rack that came with your Instant Pot Duo Crisp into the inner pot. You want the pizza close to the air fryer lid for the best crisp. If you have a nonstick or air fryer basket, that works too.

Step 2: Prepare the Tortilla Base

  • Lightly brush one side of your tortilla with olive oil. This helps it crisp up.
  • Place the tortilla (oiled side down) on a piece of baking parchment, cut to fit the base. This makes removing your pizza a breeze.
A table full of ingredients to showcase what you'll need for an Easy Instant Pot Duo Crisp Tortilla Pizza Recipe at Home

Step 3: Add Your Sauce

Spoon on a couple of tablespoons of tomato or pizza sauce. Spread it out with the back of a spoon, leaving a little space at the edge just like a classic pizza.

Step 4: Top It Up

  • Sprinkle on your cheese. Don’t skimp—gooey melted cheese is half the fun!
  • Finish with your favorite toppings. If you’re using veggies, make sure they’re sliced thin, so they cook through.
  • Sprinkle a little Italian seasoning on top. It adds an irresistible aroma as it cooks.

Step 5: Air Fry and Crisp

Transfer the parchment and tortilla pizza onto the rack or into the basket.

  • Close the air fryer lid and set your Instant Pot Duo Crisp to “Air Fry” at 190°C (375°F) for about 5–8 minutes.
  • Check after 5 minutes. When the cheese is bubbling and the edges are golden brown, you know it’s done!
A crisp Tortilla full of ingredients for pizza to showcase How to Make Tortilla Pizza in the Instant Pot Duo Crisp


Tips for the Perfect Instant Pot Tortilla Pizza

  • Keep an eye on your pizza. Because air fryers can vary, the first time is always a bit of trial and error.
  • Don’t overload your pizza with toppings. Since tortillas are thin, too many toppings can make them soggy.
  • Want a crunchier crust? Brush the top of the tortilla with a touch more olive oil before air frying.

Common Questions

Not sure about something? You’re not alone—here are a few questions I pondered before trying this recipe:

  • Can you use corn tortillas? Absolutely, though they’ll be a little smaller and even crispier.
  • What size tortilla is best? Large wraps make the most “pizza-like” slices, but even mini tortillas work and are great for snacks or kids.
  • What if I don’t have parchment paper? Lightly oiling the basket or rack can help prevent sticking, but parchment really makes life easier.

Why You’ll Love This Tortilla Pizza Recipe

  • It’s fast! Prep and cook time are both under 10 minutes.
  • Less mess in the kitchen. You won’t need to flour your counters or wash a bunch of pans.
  • Totally customizable. Have picky eaters in the house? Let everyone make their own mini pizza with their favorite toppings.
  • Healthier option. By controlling portions and ingredients, you can make a lighter version of your favorite comfort food.

Personal Note: Why I Keep Coming Back to Tortilla Pizza

One evening after a long workday, I stared into my fridge, feeling uninspired. I spotted a stack of tortillas, a half-used jar of tomato sauce, and a block of mozzarella. That’s when I remembered this genius way to make pizza in the Instant Pot Duo Crisp. 

In no time, I had a hot, cheesy dinner with almost no cleanup afterwards. Since then, it’s become a go-to on nights when I need a hot meal with minimal effort. 

There’s a feeling of playfulness too—trying new topping combos, using up leftovers, even letting my kids “build their own.”

Enjoy Your Homemade Instant Pot Pizza!

Don’t let a busy schedule, small kitchen, or lack of experience keep you from delicious homemade pizza. 

With your Instant Pot Duo Crisp and a few pantry staples, you can serve up piping hot, crispy tortilla pizzas any time you like. Ready to get started? Give this recipe a try tonight and see just how easy, fun, and tasty pizza night can be—no delivery driver required!

What toppings will you try first? Share your favorite combos or any creative twists in the comments below. Happy cooking!


Monday, April 21, 2025

Easy Pulled Pork Tacos Recipe for Flavorful Family Dinners

When you're searching for dinner ideas that are both delicious and simple, it's hard to beat pulled pork tacos. These tasty tacos use tender, flavorful pulled pork and vibrant toppings to create a meal that’s fun for everyone. 

If you’re craving Mexican-inspired dinners but want something you can throw together without much fuss, you’re in the right place!


A plate sitting on the table showing Easy Pulled Pork Tacos Recipe for Flavorful Family Dinners


Why Pulled Pork Tacos Make the Perfect Family Dinner

Ever have one of those nights when you want something comforting, but are short on time? Pulled pork tacos are a game-changer. Not only are they packed with flavor, but they’re also endlessly customizable, making them a crowd-pleaser for even the pickiest eaters in the house.

Plus, if you've ever struggled to get dinner on the table after a long day, you know the value of recipes that are both easy and satisfying. Pulled pork tacos tick both of those boxes!

What Makes Pulled Pork Tacos so Good?

  • Flavorful and juicy pork: Slow-cooked pork is melt-in-your-mouth good.
  • Endless toppings: From crunchy slaw to creamy avocado, everyone can make their perfect taco.
  • Easy to prepare ahead: Great for meal prepping or making use of leftover pork shoulder or pork butt.
  • Perfect for gatherings: These tacos are always a hit on taco night, casual get-togethers, or family game nights.

Ingredients for Easy Pulled Pork Tacos

The best part about these tacos is how simple the ingredient list is. You probably already have most of these items in your kitchen!

  • Pulled pork – This can be homemade, store-bought, or even leftovers from a barbecue.
  • Soft flour or corn tortillas – Pick your favorite. Warm them in a skillet for extra flavor.
  • Slaw – Crunchy, tangy coleslaw is a favorite taco topping. It adds great texture.
  • Avocado or guacamole – Creaminess cuts through the richness of the pork.
  • Fresh cilantro – For a burst of freshness.
  • Lime wedges – A squeeze of lime brightens every bite.
  • Pickled onions or jalapeños – For kick and tang. Perfect if you love a bit of heat!
  • Your favorite taco sauce or salsa
  • Crumbled cheese (Cotija, feta, or cheddar)

If you’re feeling creative, you can add beans, corn, or any other toppings your family loves. That’s the beauty of taco night!

A table spread full of taco fillers for Easy Pull Pork Tacos Receipe


How to Make Pulled Pork Tacos – Step by Step

Don’t worry if you’ve never made pulled pork tacos before. The process is super simple and forgiving. Here’s a quick guide:

  1. Warm the tortillas: Heat a skillet over medium heat. Warm each tortilla for about 30 seconds on each side. Keep them wrapped in a clean towel so they stay soft and steamy.
  2. Prepare your toppings: Chop, slice, and dice everything you want to use. Set up a toppings bar if you want everyone to build their own tacos at the table.
  3. Reheat or shred the pork: If using leftovers, gently warm them in a saucepan with a splash of water or chicken broth. Don’t have pulled pork ready? You can quickly make a batch in the slow cooker or Instant Pot!
  4. Build your tacos: Layer warm pork on each tortilla, then pile on slaw, avocado, cilantro, cheese, and any other toppings you love.
  5. Squeeze with fresh lime juice – This really brings all the flavors together!

That’s it! In less time than it takes to order takeout, you’ll have a hearty plate of pulled pork tacos ready to go.

Tips and Tricks for the Best Pulled Pork Tacos

If you want to take your tacos to the next level, here are some handy tips:

  • Add a rub to your pork before slow cooking. Even simple spices like paprika, cumin, garlic powder, and a little brown sugar can take the flavor up a notch.
  • Use leftovers creatively: Pulled pork keeps well in the fridge for a few days and even freezes beautifully. Use it for tacos, burritos, or nachos.
  • Make it a taco bar: Lay out all the toppings and let your family or friends build their perfect taco. This way, picky eaters and adventurous ones alike are happy.
  • Try different tortillas: Can’t decide between soft and crispy? Warm up both and let guests pick their favorite.
  • Don’t forget freshness: A sprinkle of chopped fresh herbs and a squeeze of lime really make these tacos sing.

How to Make Pulled Pork at Home

You can find store-bought pulled pork at most grocery stores, but making your own at home is easier than you may think. All you need is pork shoulder (also called Boston butt), spices, and a slow cooker or oven. Here’s a very basic approach:

  1. Rub pork with spices of your choice.
  2. Place in a slow cooker with a splash of broth, onion, and a little garlic.
  3. Cook on low for 8 hours or until the meat is tender and easy to shred.
  4. Shred the pork with two forks. Taste and season as needed.

Homemade pulled pork can be used for tacos, sandwiches, pizza, and more. Talk about versatile!


A round platter sitting on a table with white tablecloth and Pull Pork tacos on that platter.


Make It Your Own: Fun Topping Ideas

One of the best things about tacos is just how creative you can get. Want to change things up? Try these fun topping ideas for your pulled pork tacos:

  • Salsa verde
  • Mango or pineapple salsa for a touch of sweetness
  • Sour cream or Greek yogurt for creaminess
  • Chopped radishes for extra crunch
  • Fresh diced tomatoes
  • Hot sauce if you love heat!

Have kids or picky eaters? Set out plain toppings along with more adventurous options so everyone gets what they like.

Serving Suggestions and Sides

These easy pulled pork tacos are pretty filling on their own, but if you’re looking for something extra, here are a few sides that pair nicely:

  • Black beans or refried beans
  • Corn salad or Mexican rice
  • Crunchy tortilla chips with salsa or guacamole
  • Simple green salad

If you’re serving a crowd, offer a variety of sides so everyone can mix and match.

Frequently Asked Questions About Pulled Pork Tacos

Can I make these tacos if I don't have pulled pork?
Yes! You can use shredded chicken, beef, or even jackfruit for a vegetarian option.

How do I store leftovers?
Store the pork, tortillas, and toppings separately in airtight containers in the fridge for 2-3 days. Assemble tacos just before serving for the best texture.

Can I freeze pulled pork?
Absolutely. Pulled pork freezes well. Just cool completely before sealing in freezer bags. Thaw and reheat gently when ready to use.

Ready to Tackle Taco Night?

So, what are you waiting for? These easy pulled pork tacos are bursting with flavor, perfect for busy weeknights, and bound to please the whole family. They’re simple enough for a quick family dinner, yet special enough to share with friends at your next gathering. The best part? You get to build them just the way you like!

Next time you’re planning dinner, why not give pulled pork tacos a try? Your tastebuds (and your family) will thank you. Don’t forget to share your favorite toppings in the comments below—let’s make taco night even tastier together!


Easy Kale Corn Chowder Recipe for a Cozy, Healthy Meal

Looking for a comforting meal that’s also healthy and simple to prepare? This kale corn chowder recipe is the answer! Packed with fresh veggies, a creamy texture, and a rich, savory flavor, this soup will warm you up on a cold night while keeping you energized and nourished. Whether you’re a soup enthusiast or just looking to sneak more greens into your week, you'll love how easy and flexible this chowder is.

Why You’ll Love This Kale Corn Chowder

If you’ve ever craved something hearty but wanted to stick to wholesome ingredients, this kale and corn chowder strikes the perfect balance. It gives you those homey, comforting vibes of traditional chowder, but with a modern twist thanks to vibrant kale and sweet corn.


A pot full of corn chowder sitting on the table to showcase an Easy Kale Corn Chowder Recipe for a Cozy, Healthy Meal


  • Quick and easy to make: Great for weeknight dinners.
  • Nutritious: Filled with fiber, vitamins, and minerals.
  • Family-friendly: Kids and adults alike enjoy its mild, creamy taste.
  • Customizable: Swap in your favorite veggies or tweak the recipe to fit your needs.

You might be asking: “Can healthy food be cozy too?” Absolutely! This soup proves you don't have to compromise flavor for nutrition.

The Benefits of Kale and Corn

There’s a reason kale is hailed as a superfood. It’s loaded with vitamins A, C, and K, along with plenty of minerals. Pairing it with sweet corn not only adds a pop of color but also brings a natural sweetness that balances the earthiness of the greens.

  • Kale helps boost immunity and supports bone health.
  • Corn provides energy-boosting carbohydrates and antioxidants.
  • Together, they create a chowder that’s filling—but never heavy.

Think of this duo as a dynamic tag team: hearty kale fortifies your body while sweet corn lightens up the dish.

Simple Ingredients, Big Flavor

What makes this kale corn chowder really shine is how it draws out maximum flavor from minimal ingredients. Here’s what you’ll need:

  • Kale (curly or lacinato work great)
  • Fresh or frozen corn kernels
  • Potatoes for creaminess
  • Onion and garlic for depth
  • Carrots and celery for classic soup flavor
  • Vegetable broth
  • Heavy cream or coconut milk (for a dairy-free twist!)
  • Olive oil or butter
  • Salt and black pepper

Most of these are pantry staples, which means you probably won’t need to run out shopping. Aren’t meals like that the best?

How to Make Kale Corn Chowder in a Few Simple Steps

A skillet on a not burner sauteing vegetables for Easy Kale Corn Chowder Receipe.

Sauté Your Veggies

If you’re new to making chowder, don’t worry—this recipe is truly beginner-friendly. Just follow these steps and you’ll end up with a warm, vibrant pot of soup.

1. Sauté Your Veggies

Start by heating olive oil or butter in a big soup pot over medium heat. Add the chopped onion, carrot, and celery. Cook until they’re softened, about 5 minutes. Stir in minced garlic and cook for another minute until it smells delicious.

2. Build the Base

Add your diced potatoes and corn to the pot, then pour in the vegetable broth. Bring everything to a gentle simmer. Season generously with salt and pepper. Let the chowder bubble away until the potatoes are tender—this usually takes about 15 minutes.

Woman's hands sauteing vegetables for the Easy Kale Corn Chowder Receipe.


3. Stir in the Kale

Add the chopped kale to the pot. It might seem like a lot at first, but don’t worry—it wilts quickly. Simmer for another 5 minutes until the kale is soft and vibrant.

4. Blend (Optional) for Creaminess

If you love a creamy soup, scoop out a couple cups of the chowder and blend until smooth. Stir it back into the pot. This thickens the soup without adding extra cream, while keeping all those veggie nutrients intact.

5. Add Creaminess

Pour in the heavy cream or coconut milk. Give the soup a final stir and adjust seasoning to taste. Don’t be shy with the black pepper—it brings all the flavors to life!

Tips and Variations

An elegant kitchen with a pot of corn chowder on the burner and a plated bowl next to it.

Do you like playing around with recipes? This chowder is a great canvas for creativity:

  • Add protein: Stir in cooked chicken, crispy bacon, or white beans for extra substance.
  • Make it spicy: Add a pinch of cayenne pepper or smoked paprika for heat.
  • Try different greens: Swap kale for spinach or Swiss chard.
  • Go dairy-free: Use coconut milk or your favorite plant-based cream.

I sometimes toss in a handful of frozen peas or even a sprinkle of grated cheese on top. It’s a forgiving recipe, so feel free to make it your own!

How to Serve Your Kale Corn Chowder

A plated bowl with Easy Kale Corn Chowder Receipe, bread and place settings and a glass of water next to it.

BON APPETITE!

When it comes to serving chowder, I love keeping it simple—just a big bowl and a hunk of crusty bread for dipping. It’s also tasty alongside a fresh salad or a grilled cheese sandwich for those extra-hungry days.

Leftovers reheat beautifully, making this soup a winner for meal prep. In fact, I think the flavors get even better the next day. Pour a mug for lunch or freeze a batch for when you need a quick, cozy meal in a pinch.

Frequently Asked Questions (FAQs)

Can I use frozen kale or corn?

Absolutely! Just add them right from the freezer. The soup will be ready in no time and just as flavorful.

How do I store leftovers?

Let the chowder cool completely, then refrigerate in an airtight container for up to 4 days. It reheats well on the stove or in the microwave.

Can I freeze this chowder?

Yes, but keep in mind chowder with cream may change texture after freezing. If you’re going to freeze it, do so before adding cream, and stir it in fresh when you reheat.

Kale Corn Chowder: The Ultimate Cozy and Healthy Meal

In the end, this kale corn chowder recipe is proof that comfort food can be both nourishing and satisfying. It’s a hearty, wholesome dish that invites you to slow down and savor each bite. Whether you’re feeding your family, meal-prepping for the week, or just treating yourself to a cozy night in, this soup is always a good idea.

So, why not give it a try? Your taste buds—and your body—will thank you. Happy cooking!


How to Make Strawberry Pavlova: A Simple Step-by-Step Guide

If you've ever wanted to wow your family or guests with a show-stopping dessert, strawberry pavlova is a wonderful place to start.  Thi...