Disclaimer

This content was created with the help of AI

Friday, May 30, 2025

Authentic Papas a la Mexicana Recipe for Flavorful Mexican Potatoes

Are you looking for a quick, flavorful, and affordable dish to spice up your meals? Let me introduce you to Papas a la Mexicana—a classic Mexican potato recipe that’s as easy to make as it is delicious to eat. 

If you love potatoes and crave fresh, vibrant flavors, this dish is sure to become a staple in your kitchen!

What Are Papas a la Mexicana?


Let’s start with the basics. Papas a la Mexicana literally means “potatoes in the Mexican style.” 

This simple comfort food combines potatoes with three ingredients that are at the heart of Mexican cooking:

  • Tomatoes 
  • Onions 
  • Green chili peppers (usually jalapeño or serrano) 

These three ingredients—green, white, and red—so whenever you see "a la Mexicana" in a recipe, you know those flavors are involved. 

It’s a celebration of Mexican tradition, all wrapped up in a warm, cozy potato dish.


3 ingredients tomatoes, onions, and green chili pepper

(1) IMAGE SOURCE | (2) IMAGE SOURCE | (3) IMAGE SOURCE

Why You’ll Love This Mexican Potato Recipe

  • Quick & Easy: You can make it in about 30 minutes from start to finish.
  • Budget-Friendly: Potatoes and fresh veggies won’t break the bank.
  • Versatile: Serve as a main dish, breakfast, or taco filling.
  • Healthy: Naturally vegan, gluten-free, and packed with veggies.

I love making papas a la Mexicana on busy weeknights or lazy weekends. The aroma of sautéed onions and chilies instantly brings me back to family dinners at my abuela’s house. 

There’s just something about the way these simple ingredients come together that feels like home.

Ingredients You’ll Need

Ready to give this authentic Mexican potato recipe a try? Here’s what you’ll need:

  • Potatoes: Russet or Yukon Gold are great, but any white potato works.
  • Tomatoes: Use ripe, red tomatoes for the best flavor.
  • Onion: White onion is traditional, but yellow or red is fine.
  • Green Chilies: Jalapeño if you want something milder, serrano for more heat.
  • Garlic: Not always traditional, but I love tossing it in. Totally optional!
  • Oil: Vegetable or olive oil both work well.
  • Salt: To taste, of course.

That’s it! No fancy ingredients—just pantry staples and fresh veggies.

How to Make Papas a la Mexicana: Step by Step

Making this recipe is a breeze. Here’s how I do it:

1. Prep Your Veggies

Dice the potatoes into small cubes (no need to peel unless you want to). Chop the onions, tomatoes, and chilies. I like everything about the same size so it cooks evenly. 

Pro tip: If you don’t like it too spicy, remove the seeds and ribs from your chilies.

2. Start with the Potatoes

Heat some oil in a large skillet over medium heat. Add the diced potatoes and a pinch of salt. Let them cook for about 10 minutes, stirring often so they get a little golden but don’t stick. 

(It’s okay if they’re not soft yet—they’ll finish cooking soon!)

3. Add the Flavors

Toss in the chopped onions, tomatoes, chilies, and garlic. I just love how my kitchen smells at this stage! Stir well, cover, and cook everything together for about 10-15 minutes. 

The steam will help the potatoes finish cooking while the flavors blend.

4. Taste and Serve

Uncover the skillet and check that the potatoes are fork-tender. Adjust salt if needed. Sometimes I sprinkle in a bit of black pepper, but that’s up to you.

Ways to Serve Papas a la Mexicana


3 images of corn tortillas, salsa and potatoe taco


This dish is super versatile! Here are some of my favorite ways to enjoy papas a la Mexicana:

  • Breakfast: Tuck them into warm corn tortillas with a spoonful of salsa.
  • Lunch: Serve as a filling for tacos, burritos, or gorditas.
  • Side Dish: Pair with Mexican rice, refried beans, or a hearty salad.
  • Main Meal: Top with sliced avocado and fresh cilantro for a satisfying vegan dinner.

Sometimes, when I’m feeling nostalgic, I eat a big bowl of these potatoes all by themselves. Other times, I toss a handful into scrambled eggs for a quick breakfast twist. 


3 images of cilandro, avocado and a salad

 (1) IMAGE SOURCE | (2) IMAGE SOURCE

However you serve them, they never disappoint!

Tips for the Best Papas a la Mexicana

  • Cook potatoes first so they turn out perfectly soft.
  • Use ripe tomatoes for a burst of flavor and color.
  • Don’t overcrowd the pan; otherwise, they’ll steam instead of brown.
  • Want more flavor? Add a pinch of cumin or a squeeze of lime.

Feel like getting creative? Try swapping in sweet potatoes or adding leftover cooked veggies. This dish is all about embracing what you have on hand!

Common Questions about Papas a la Mexicana

  • Can I make them ahead?
    Absolutely! They reheat well in the microwave or stovetop. I sometimes make a big batch for easy breakfasts during the week.
  • Are they spicy?
    That’s up to you. Use jalapeños for mild heat, or try poblano peppers for something even gentler. Love spice? Double up on serranos!
  • Can I freeze papas a la Mexicana?
    Yes, though the texture of potatoes may change a bit after freezing. Best enjoyed fresh or within a few days from the fridge.

Bring the Flavors of Mexico to Your Table

                                                                
Authentic Papas a la Mexicana Recipe for Flavorful Mexican Potatoes

If you’re searching for an authentic, budget-friendly, and satisfying Mexican potato dish, Papas a la Mexicana is a must-try. 

With just a few simple ingredients and about half an hour, you can create a meal that’s bursting with color and flavor.

Why not invite friends or family over for a casual dinner, and serve these vibrant Mexican potatoes alongside your favorite salsas and tortillas? 

Trust me, they’ll be asking for seconds—and the recipe!

So next time you see a lonely bag of potatoes in your pantry, remember: an authentic Mexican feast might be just thirty minutes away. 

Enjoy these delicious papas a la Mexicana and bring a taste of Mexico into your home!


How to Make Dollywood Cinnamon Bread at Home Easily

There’s just something magical about the smell of fresh-baked cinnamon bread wafting through your kitchen. If you’ve ever visited Dollywood, you probably know the irresistible scent I’m talking about! 

Their famous cinnamon bread is legendary—and no trip to the Smoky Mountains feels complete without a warm slice dripping with sweet icing. But what if you could recreate that cozy Dollywood feeling in your own kitchen? Good news: you can! 

In this blog post, I’ll show you how to make Dollywood cinnamon bread at home with easy-to-find ingredients and simple steps—no baking expertise required.

Why Everyone Loves Dollywood Cinnamon Bread


A loaf of Dollywood Cinnamon Bread


If you're wondering what makes Dollywood cinnamon bread so special, let’s break it down. It's not just any cinnamon bread. Each loaf is soft and pillowy on the inside, with a sweet, sticky crust on the outside. 

Swirls of brown sugar and cinnamon throughout make every bite ooze with cozy flavor. Plus, a drizzle of vanilla icing seals the deal.

When I visited Dollywood years ago, the memory of biting into that warm, gooey bread stuck with me. Remaking it at home always brings those fun vacation vibes right back!

What You Need to Make Dollywood Cinnamon Bread at Home


3 images of dough, butter and brown sugar


You don’t have to be a pro baker to nail this recipe. In fact, a smart shortcut makes it extra simple: frozen bread dough. Using store-bought dough means you’re just a few steps away from delicious homemade cinnamon bread. Here’s what you'll need:

  • Frozen bread dough (thawed)
  • Unsalted butter (melted)
  • Granulated sugar
  • Ground cinnamon
  • Brown sugar
  • All-purpose flour
  • Vanilla extract
  • Powdered sugar
  • Milk

Pro tip: If you can’t find frozen bread dough, you can swap in your favorite homemade bread dough or even refrigerated biscuit dough—just keep an eye on bake times.

Step-by-Step: Making Dollywood Cinnamon Bread the Easy Way


Woman in kitchen consulting her menu


This recipe is perfect for busy families, weekend brunch, or even a weekday pick-me-up. I like how you can get the kids involved—there’s something fun about rolling and dipping the dough in cinnamon sugar!

1. Prepare Your Dough

First things first—make sure your dough is thawed and soft. Lightly flour your work surface and lay out the dough. With your hands or a rolling pin, gently stretch the loaf into a rectangle about 8 by 12 inches. No need for perfection here!
2. Cut and Score

Now, using a sharp knife, make four deep slashes across the dough, being careful not to cut all the way through. This step helps the cinnamon sugar mix seep right into every bite.

3. Dip, Sprinkle, and Roll

Time for the fun part:

  • Brush the entire dough surface with melted butter.
  • In a bowl, mix your granulated sugar, brown sugar, and cinnamon.
  • Generously sprinkle the cinnamon-sugar mixture all over the buttered dough, making sure it gets into those slashes.

Once coated, roll up the dough from the shorter side (like rolling up a sleeping bag). Place the rolled dough into a greased loaf pan, seam side down.

4. Let It Rise

Patience pays off here! Cover your loaf with a kitchen towel and let it rise in a warm spot until it puffs up—this can take one to two hours, depending on your kitchen temperature.

5. Bake to Golden Perfection

Once your loaf is nice and puffy, bake it in a preheated oven at 350°F for about 30 minutes or until golden brown on top and cooked through. Your kitchen will smell absolutely heavenly—that’s your sign it’s almost time to eat!

6. Add the Flavorful Icing


3 Bags of Icing Mix


While the bread cools for a few minutes, mix up a simple vanilla icing: whisk powdered sugar, a little milk, and vanilla extract together until smooth. 

Next, drizzle the icing over the warm bread, letting it seep into all those cozy crevices.

Tips for the Best Homemade Cinnamon Bread

Ready to level up your baking game? Here are some simple pointers:

  • Don’t rush the rising time. Warmer environments help, so pop it near a sunny window if you can.
  • Love extra cinnamon? Sprinkle a touch more inside or even add some cinnamon on top before baking.
  • Slice while warm, but not hot, for perfect pieces that don’t fall apart.
  • Try it with raisins or nuts for a fun twist—just add them before rolling up the dough.

To me, the best part is enjoying a fresh, gooey slice with a cup of coffee or a mug of cocoa. It’s like bringing the Dollywood spirit right to your kitchen table!

Storing and Reheating Dollywood Cinnamon Bread

If you manage to have leftovers (trust me, they disappear fast!), just wrap the cooled bread well in plastic wrap or foil. It stays soft at room temperature for two days, or you can refrigerate it for up to a week.

Want to enjoy it warm again? Simply pop a slice into the microwave for 10-15 seconds or heat the whole loaf in a 300°F oven for about 10 minutes. The icing will melt right in, making it extra gooey and delicious.

Why Make Cinnamon Bread at Home?

You don’t have to travel all the way to Tennessee to get your cinnamon bread fix. With this simple recipe, you can bring those cozy Dollywood vibes right to your kitchen door. 

It’s the kind of treat that sparks smiles—whether you’re serving it as a holiday breakfast, sharing a loaf with friends, or just treating yourself on a quiet morning.

Plus, making cinnamon bread at home is easier than you think. It doesn’t require fancy tools, and you can tweak it to fit your family’s taste. 

Want a glaze with a hint of orange or maple? Go for it! Prefer it a bit less sweet? Adjust the sugar. This recipe is as flexible as it is delicious.

Got Questions? Here Are Some Quick Answers!

  • Can I freeze this cinnamon bread? Yes! Wrap the cooled loaf tightly and freeze for up to three months. Thaw at room temperature, then reheat as you like.
  • What if I don’t have frozen bread dough? You can use homemade dough or even store-bought pizza dough in a pinch—just keep an eye on the rise and cook times.
  • Is this bread kid-approved? Absolutely! Kids love helping sprinkle the cinnamon sugar and eating the results.
  • How do I make this bread healthier? You can swap some of the sugar for a sugar substitute and use whole wheat dough for extra fiber. It won’t taste quite the same, but it’s still yummy!

Bring Dollywood to Your Kitchen Today

Ready to dive in and make your own Dollywood-style cinnamon bread? With the tricks above, you’ll be savoring that famous sweet treat in no time. 

Not only will your house smell amazing, but your friends and family will be impressed by your baking skills—even if you took a shortcut or two.

If you give this recipe a try, I’d love to hear how it turns out. Do you have special memories of Dollywood cinnamon bread, or did you put your own spin on this recipe? Share your tips and stories in the comments below! 

Let’s bring a little taste of the Smokies to kitchens everywhere—one delicious loaf at a time.


Wednesday, May 28, 2025

Easy White Chicken Enchilada Casserole Recipe for Family Dinners

Looking for a quick and cozy meal that brings everyone together? You won’t want to miss this White Chicken Enchilada Casserole

This creamy, cheesy, and comforting recipe is perfect for busy weeknights or laid-back weekends when the whole family craves something delicious and satisfying.


What Makes This White Chicken Enchilada Casserole So Special?

Let’s be honest—who can resist a warm, bubbling casserole fresh out of the oven? For me, casseroles are the definition of comfort food. 

And this easy chicken enchilada casserole really checks all the boxes: simple ingredients, minimal prep time, loads of flavor, and—most importantly—happy, full bellies at the dinner table.

If you’re bored of the same old casseroles or traditional red-sauce enchiladas, this white version is about to become your new favorite. It swaps out tomato sauce for a dreamy, velvety white enchilada sauce made with sour cream and green chilies. 

The result is a dish that’s bursting with savory flavors but just the right amount of mild heat—perfect for kids and adults alike!

Why You’ll Love This Chicken Enchilada Casserole

  • Quick and easy prep: Great for busy families—assemble in minutes!
  • No rolling needed: Layered like lasagna for zero fuss.
  • Creamy and cheesy: Perfect levels of indulgence without overwhelming the dish.
  • Customizable: Swap in your favorite cheeses or add veggies like corn, beans, or mushrooms.
  • Kid-approved: Mild flavors, but easy to spice up for heat-lovers.

Ingredients You’ll Need


What’s great about this casserole is that most items are probably already in your fridge or pantry. Here’s what you’ll need for this easy white chicken enchilada casserole recipe:

  • Cooked shredded chicken (rotisserie chicken is a lifesaver here!)
  • Flour tortillas
  • Monterey Jack and cheddar cheese
  • Sour cream
  • Canned green chilies
  • Condensed cream of chicken soup
  • Chicken broth
  • Seasonings (garlic powder, onion powder, salt & pepper)

See? Nothing fancy or hard to find. You can even use leftover turkey or substitute flour tortillas with corn if that’s your preference. I love dishes that help me use up leftovers!

Step-by-Step: How to Make White Chicken Enchilada Casserole


This casserole skips the tedious step of rolling enchiladas. Instead, you’ll layer everything—a total time-saver! Wondering what you need to do? 

Here’s a quick rundown:

1. Preheat and Prepare

Start by preheating your oven and lightly greasing a baking dish. This ensures nothing sticks and cleanup is a breeze.

2. Make the Creamy White Sauce

In a saucepan, combine sour cream, cream of chicken soup, chicken broth, green chilies, and your seasonings. Gently cook and stir until everything is smooth and heated through. 

This sauce is what makes the casserole so special—think of it as extra flavor and comfort in every bite.

3. Layer the Casserole

Here comes the fun part! In your dish, layer half the tortillas, half the chicken, half the creamy sauce, and half the cheese. Then, repeat those layers once more, finishing with a generous layer of cheese on top. Each layer melts together, just like a lasagna, but with Tex-Mex flair.

4. Bake to Perfection

Pop the casserole in the oven and bake until the cheese is perfectly melted and the edges are bubbling. For that golden, irresistible finish, you can broil the casserole for a minute or two—just keep an eye on it so it doesn’t burn!

Tips for the Perfect Chicken Enchilada Casserole

  • Use rotisserie chicken: It saves time and adds extra flavor.
  • Make ahead: Assemble the casserole earlier in the day and bake when ready to eat.
  • Add-ins: Want some crunch? Stir in corn or black beans. Like it spicy? Add a dash of hot sauce or sliced jalapenos.
  • Toppings: Top with fresh cilantro, sliced avocado, or diced tomatoes for extra freshness and color.

Serving Suggestions: What Goes with White Chicken Enchilada Casserole?


This dish is delicious on its own, but if you want to make it a full meal, here are a few ideas:

  • Simple side salad with a zesty dressing.
  • Mexican rice or cilantro lime rice.
  • Refried beans or black beans.
  • Tortilla chips and salsa for a crunch.

We often set up a mini-toppings bar on taco night so everyone can build their plate the way they like. It keeps the meal fun and interactive—especially with picky eaters at the table!

How to Store and Reheat Leftovers

Leftover casserole? Lucky you! Store any uneaten portions in an airtight container in the fridge for up to 3-4 days. To reheat, just pop a piece in the microwave or warm it in the oven. 

The flavors actually deepen overnight, making lunch the next day extra tasty. In fact, casseroles like this sometimes taste even better the second time around—like pizza on day two!

Can I Freeze This Casserole?

Absolutely! Assemble the casserole as directed but don’t bake it. Instead, cover tightly and freeze. When you’re ready to eat, thaw overnight in the fridge and bake as usual. 

It’s a great option for meal prepping or sharing with friends and neighbors.

Easy Additions and Substitutions


This recipe is super forgiving and perfect for customizing. Here are a few ideas to play with:

  • Swap tortillas: Use corn for a gluten-free option.
  • Switch the soup: Try cream of mushroom or even cream of celery for a flavor twist.
  • Use another cheese: Pepper Jack or Colby blend adds a different flavor kick.
  • Add veggies: Diced bell peppers, spinach, or zucchini work well.

Why This White Chicken Enchilada Casserole Belongs in Your Recipe Box

From the first creamy bite to the last cheesy scrape of the pan, this easy white chicken enchilada casserole delivers big on flavor and comfort. It’s a perfect way to feed a hungry crew without spending hours in the kitchen. 

Whether you’re looking for new family dinner ideas or just a hearty meal to warm up a cold night, this is one recipe you’re sure to come back to, time and again.

So next time you need a simple, satisfying meal that everyone will love, give this white chicken enchilada casserole recipe a try. Trust me—it’s the kind of dish that turns any night into a special family dinner!

Have You Tried This Recipe?

I’d love to know—what’s your favorite twist on enchilada casseroles? Did you add any extra goodies? Leave a comment below and let’s make dinner time even better, together!

Tuesday, May 27, 2025

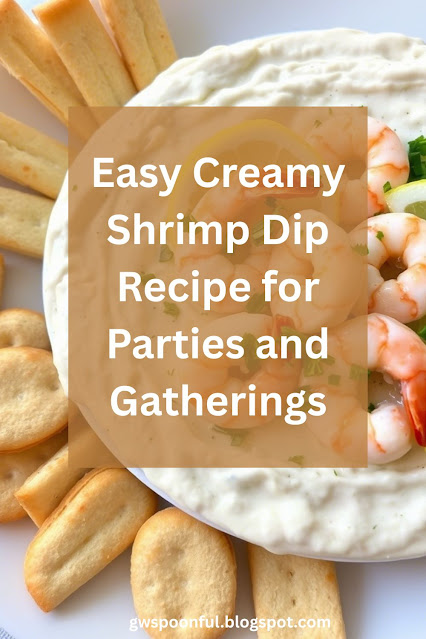
Easy Creamy Shrimp Dip Recipe for Parties and Gatherings

Are you searching for that perfect appetizer to bring to your next party, potluck, or gathering? Something that’s effortless to prepare yet guaranteed to impress everyone. 

Look no further—this easy creamy shrimp dip recipe will be the talk of the table. Whether you’re hosting a game night or celebrating family holidays, this delicious dip is always a crowd-pleaser.


A plate of asy Creamy Shrimp Dip Recipe for Parties and Gatherings


Why Shrimp Dip is the Party Hero

Let’s be honest, when you walk into a party, what’s the first thing you look for? For me, it’s always the snack table! 

There’s just something about a tasty, creamy shrimp dip surrounded by crunchy crackers or fresh veggies. It says, “Come on in and help yourself!” 

I love bringing this easy shrimp dip to parties because it’s so simple, yet it feels a little bit fancy—with zero stress.

What Makes This Creamy Shrimp Dip So Special?

  • Quick and easy: You can whip this up in less than 10 minutes. No cooking necessary!
  • Few ingredients: Most of these are pantry staples, so chances are you have what you need already.
  • Crowd favorite: Both seafood lovers and skeptics end up going back for seconds.
  • Make ahead: It tastes even better after chilling, letting the flavors blend together.

Ingredients You’ll Need


Soften Cream Cheese on a plate for Ingredients You’ll Need - Soften Cream Cheese

You don’t need a long list of hard-to-find ingredients for this rich, creamy shrimp dip. Here’s what you’ll want to have on hand:


Ingredients You’ll Need - Cooked Tiny Shrimp

IMAGE SOURCE

  • 8 ounces of softened cream cheese
  • 1 (4 oz) can cooked tiny shrimp, drained and chopped
  • ½ cup mayonnaise
  • ½ teaspoon Worcestershire sauce
  • 1 tablespoon fresh lemon juice (for a splash of brightness!)
  • 1 tablespoon chopped green onions or chives
  • Salt and black pepper, to taste
Ingredients You’ll Need - Freshly Squeezed Lemon

Simple, right? If you’re not a fan of canned shrimp, you can use thawed frozen shrimp or even leftover cooked shrimp from another meal. 

This recipe is flexible and forgiving, which is always a win in my book!

Step-by-Step: How to Make Easy Shrimp Dip

Ready to get started? Just follow these quick steps:

  1. Mix the base: In a large mixing bowl, combine the cream cheese and mayonnaise until the mixture is smooth and creamy. It helps if your cream cheese is at room temperature—nobody likes lumpy dip!
  2. Add the flavor: Stir in the Worcestershire sauce, lemon juice, green onions (or chives), and a pinch of salt and pepper. Give it a taste and adjust the seasonings as you like.
  3. Stir in the shrimp: Gently fold in the chopped shrimp so they’re evenly distributed.
  4. Chill: Cover the dip and let it chill in the fridge for at least an hour. Trust me, allowing it to rest makes all the flavors marry together beautifully.
  5. Serve: Spoon your shrimp dip into a serving bowl, sprinkle with extra green onions for color, and surround with your favorite dippers—crackers, baguette slices, celery, or bell pepper strips.

That’s really it—it’s as easy as mixing, chilling, and serving. I’ve even doubled this recipe for bigger crowds, and it’s always gone by the end of the night!

Serving Tips & Variations


Serving Tips & Variations - Saltine Crackers


Wondering what goes well with shrimp dip? Here are a few of my favorite dippers and serving ideas:

  • Crispy crackers (Ritz, saltines, or wheat crackers work great)
  • Thinly sliced baguette or toasted crostini
  • Fresh celery sticks, carrot sticks, or bell pepper strips for a lighter touch
  • Pretzel sticks or chips for something a little different

Like to change things up? Try stirring in a dash of hot sauce for some kick or sprinkle on a little smoked paprika before serving. If you want a lighter version, try swapping regular mayo for Greek yogurt. 

You can even serve it as a sandwich spread for fun lunches—trust me, it’s just as good between two slices of bread!

Frequently Asked Questions About Shrimp Dip

Let’s tackle some common questions about this classic appetizer:

  • Can I make shrimp dip ahead?
    Absolutely! In fact, letting it chill for a few hours or even overnight really boosts the flavor.
  • Do I have to use canned shrimp?
    Not at all. Chopped, cooked fresh or frozen shrimp work perfectly. Just chop them small so each bite gets some shrimp goodness.
  • How long does shrimp dip last?
    Cover and refrigerate leftovers for up to 2 days. After that, seafood dips should be enjoyed or tossed as a precaution.

Still hesitant about bringing a seafood dip to a gathering? Don’t worry! This creamy shrimp dip strikes the perfect balance—it’s flavorful without being overpowering and smooth without being too heavy. 

Even those who are unsure about shrimp tend to love it! Think of it as the seafood version of your favorite onion dip—comforting, familiar, and irresistibly scoopable.

Why You Should Try This Easy Shrimp Dip Recipe

For years, I was intimidated by the idea of making seafood dips, worrying they’d be finicky or “fishy.” 

But this easy shrimp dip recipe is proof that great appetizers don’t need to be complicated. With just a few simple ingredients and a few minutes of prep, you’ll have a creamy, flavorful dip that disappears in a flash.

If you’re looking for a recipe that:

  • Takes less than 10 minutes of active prep
  • Wows your guests at parties or holidays
  • Uses cost-effective ingredients
  • Is totally customizable for your tastes

—this shrimp dip checks all the boxes!

Give It a Try!

Next time you’re planning a party or need a quick but impressive appetizer, remember this easy creamy shrimp dip recipe. Not only is it packed with flavor, but it also brings people together around the table—just like good food should. 

Give it a try, and watch your guests keep coming back for more.

Have you made your own shrimp dip before? Do you have a secret twist you like to add? I'd love to hear what makes your version special! 

Share your tips and memories in the comments below—let's build a collection of the best holiday and party appetizers together.

Happy dipping!


Monday, May 26, 2025

Kentucky Hot Brown Sliders Recipe for Delicious Southern Flavor

Have you ever craved something comforting, cheesy, and completely packed with Southern flavor? 

If you’re a fan of classic sandwiches or looking for a unique party snack, you’ll love these Kentucky Hot Brown Sliders

Let me take you on a flavorful journey to the heart of Kentucky’s most famous sandwich—reimagined as irresistible bite-sized sliders!


Image of a Kentucky Hot Brown Sliders Recipe for Delicious Southern Flavor

What Is Kentucky Hot Brown Sliders?

The Hot Brown Sandwich is a true Kentucky classic, originally created at the Brown Hotel in Louisville. Traditionally, it’s an open-faced sandwich with turkey, bacon, juicy tomatoes, and a rich, creamy cheese sauce. 

But sometimes, you just want that amazing taste in a form that’s perfect for sharing. That’s where these sliders come in! 

They have all the same great flavors, but in soft, buttery rolls that are ideal for parties, game days, or even a weeknight dinner.

Why You’ll Love This Southern-Inspired Slider Recipe

Still not convinced? Here’s why these sliders should be next on your meal list:

  • Easy to Make: No complicated steps or hard-to-find ingredients here!
  • Packed with Flavor: Layers of turkey, cheese, bacon, and a dreamy creamy sauce.
  • Perfect for Sharing: Whether you’re hosting friends or just feeding your family, sliders are always a hit.
  • Customizable: Swap in your favorite cheeses or add extra toppings if you’re feeling creative.

Doesn’t that sound tempting? Let’s dig a little deeper!

Ingredients for Kentucky Hot Brown Sliders


Image of a Kentucky Hot Brown Slider

What makes these sliders so special is the combination of simple ingredients that come together to form something unforgettable. Here’s what you’ll need:

  • Soft dinner rolls or Hawaiian rolls
  • Sliced deli turkey (leftover roast turkey works too!)
  • Cooked crispy bacon
  • Fresh tomato slices
  • Slices of Swiss or Monterey Jack cheese
  • Creamy cheese sauce (homemade or store-bought… I’ll share an easy version below!)
  • Melted butter
  • Garlic powder, onion powder, and a pinch of paprika
  • Chopped fresh parsley (optional, but it adds a pop of color and flavor)

Most of these items might already be in your kitchen! And if you’ve got leftover turkey from Thanksgiving or a special roast, this is the perfect recipe to use it up.

Can I Use Different Cheese?


An image of Swiss Cheese Close-up


Absolutely! Swiss, Monterey Jack, provolone, or even cheddar all work great. Use what you love or what’s in your fridge.

How to Make Kentucky Hot Brown Sliders: Step-by-Step

Ready to get cooking? Here’s a simple guide to creating these Southern beauties.

  1. Prepare the Rolls: Slice your rolls in half horizontally (keeping the bottom half and top half intact for easy assembly).
  2. Layer the Goodies: On the bottom layer, add a blanket of sliced turkey, followed by crispy bacon strips and fresh tomato slices.
  3. Add Cheese: Place slices of your chosen cheese on top of the bacon and tomatoes.
  4. Creamy Sauce Time: Pour the creamy cheese sauce over the whole stack. It soaks right in, adding flavor to every bite.
  5. Top & Butter: Place the top half of the rolls back on, then brush them generously with melted butter mixed with garlic and onion powder, plus a dash of paprika.
  6. Bake to Perfection: Bake at 350°F for about 20 minutes, or until the tops are golden and the cheese is bubbly.
  7. Finishing Touches: Sprinkle with chopped parsley before serving, if you like a little freshness.

The result? Warm, gooey, and unbelievably delicious sliders with gooey cheese and a slightly crispy top—truly a taste of the South in every bite.

Homemade Cheese Sauce: Quick & Easy

If you want to go the extra mile, making your own cheese sauce can really boost the flavor. Here’s a basic recipe:

  • 2 tablespoons butter
  • 2 tablespoons flour
  • 1 cup milk
  • 1 to 1.5 cups shredded Swiss (or your favorite cheese)
  • Salt and pepper to taste

Just melt the butter in a saucepan, stir in the flour to form a paste, then whisk in the milk. Let it thicken, then add cheese, salt, and pepper. Stir until smooth. That’s it—you’re ready to pour it over your sliders!

Tips and Tricks for the Perfect Sliders

Want your sliders to be truly unforgettable? Here are a few pointers from my kitchen to yours:

  • Don’t Skimp on Sauce: The creamy cheese sauce is what sets these apart!
  • Crisp Up Your Bacon—It adds texture and flavor that really stands out.
  • Keep an Eye on the Oven: Every oven is different, so check your sliders at the 15-minute mark.
  • Serve Immediately: They’re best hot and fresh, right out of the oven.
  • Great for Leftovers: You can reheat them, but the cheese is best when freshly melted.

Planning to feed a crowd? You can easily double or even triple the batch. These sliders are always the first thing gone at our family gatherings—people just can’t get enough!

Serving Suggestions & Variations


Image of potatoe salad

These sliders play nicely with all kinds of side dishes. Try them with:

  • Coleslaw
  • Potato salad
  • Fresh green salad
  • Pickles for a tangy crunch

Looking to switch things up? Try adding a layer of sautéed mushrooms, or swapping turkey for ham. You could even make a vegetarian version with mushrooms and spinach. The possibilities are endless!


Image of coleslaw closeup

IMAGE SOURCE

Frequently Asked Questions

Can I prep these sliders ahead of time?

You sure can! Assemble up to the baking stage, keep them covered in the fridge, and bake just before serving.

What if I don’t have fresh turkey?

No problem. Use deli turkey or even leftover chicken—whatever’s handy works great.

Are Kentucky Hot Brown Sliders spicy?

Not at all! But if you like a little heat, toss in a pinch of crushed red pepper or use pepper jack cheese.

Bring Kentucky’s Classic Flavors to Your Table

If you’re searching for a crowd-pleasing, easy-to-make dish that brings a taste of Southern comfort to every bite, these Kentucky Hot Brown Sliders are the answer. 

They’re warm, cheesy, and full of that signature Kentucky flavor. Why not whip up a batch for your next party or family night? I promise, it’s a recipe you’ll come back to again and again!

Have you tried the legendary Hot Brown sandwich before, or is this your first taste of Kentucky tradition? 

Let me know your thoughts and favorite slider fillings in the comments below!


Sunday, May 25, 2025

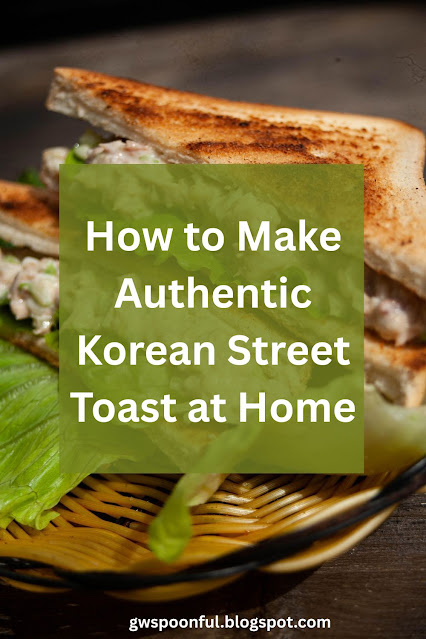
How to Make Authentic Korean Street Toast at Home

Ever walked the bustling streets of Seoul on a chilly morning? If you have, you’ve likely caught the mouthwatering aroma of sizzling Korean street toast wafting through the air. 

There’s something irresistible about this sweet, savory sandwich that hits all the right spots. The best part? You don’t need a ticket to Korea or fancy gadgets to enjoy it. 

Let’s dive into how you can make this beloved Korean breakfast staple right in your own kitchen!


IMAGE SOURCE

What Is Korean Street Toast?

If you’re new to Korean cuisine, you might be wondering, “What exactly is Korean street toast?” Picture this: buttery, golden bread hugging a warm, hearty omelets, stuffed with crisp vegetables and a touch of sweetness. 

It’s topped with just enough savory ham and gooey cheese to satisfy your cravings. This humble sandwich is a classic Korean breakfast, often served from food carts to hungry commuters in the morning.

  • Egg and veggie omelet: The core of the sandwich, packing protein and crunch.
  • Soft, buttery bread: Typically, white sandwich bread, toasted in butter for extra flavor.
  • Surprising sweetness: A dash of sugar and sometimes ketchup or mayonnaise ties everything together in that signature Korean way.
Ingredients to Make Korean Toast - What Is Korean Street Toast?


Why Try Korean Street Toast?

So, what makes this simple sandwich so special? Korean street toast is a perfect blend of textures and flavors. 

Whether you’re a college student looking for a quick breakfast or a parent wanting to upgrade the usual sandwich for your kids, this recipe is a real crowd-pleaser.

I started making Korean street toast during a cold winter, searching for a new comfort breakfast. It quickly became a weekend favorite at my house—not just for its taste, but because it uses basic ingredients I already had in the fridge. 

Plus, each bite reminds me of early morning food stalls buzzing with energy.

Korean Street Toast: Pantry Stables


Different Korean Street Toast: Pantry Stables


Let’s talk about the ingredients you’ll need. You may already have most of them in your pantry. Here’s what makes up a classic Korean street toast:

  • 2 slices of white sandwich bread
  • 2 large eggs
  • 1/4 cup chopped cabbage (don’t skip this—it adds crunch!)
  • 2 tablespoons shredded carrots
  • 1 tablespoon chopped green onions
  • 1 tablespoon butter
  • 1 slice of ham (optional, but recommended)
  • 1 slice of cheese
  • Sugar (yes, really!)
  • Ketchup and mayonnaise, to taste
  • Salt and pepper, to taste

See any ingredients you don’t like? Feel free to swap the ham for turkey or go vegetarian by leaving it out. The beauty of this sandwich is its flexibility.

Step-by-Step: How to Make Authentic Korean Street Toast


3 different images shown for a Step-by-Step: How to Make Authentic Korean Street Toast


Mouthwatering yet? Here’s how you can whip up Korean street toast in just a few easy steps. 

You don’t need a lot of time—even inexperienced cooks can master this!

1. Prep the Veggies and Eggs

  • Chop the cabbage, carrots, and green onion finely. The smaller, the better—they’ll blend smoothly into the eggs.
  • Crack the eggs into a bowl. Add your veggies, plus a pinch of salt and pepper.
  • Give it all a good whisk, making sure everything is mixed evenly.

2. Cook the Omelet

  • Melt half the butter in a nonstick pan over medium heat.
  • Pour in your egg-veggie mixture. Let it cook until it’s mostly set, then flip it like a pancake. Don’t worry if it isn’t perfect—that’s part of the charm!
  • Once cooked through, slide it onto a plate.

3. Toast the Bread

  • Add the remaining butter to the pan and let it melt.
  • Place both slices of bread in the pan and cook until golden brown and crisp. Flip to brown the other side.

4. Assemble Like a Pro


Korean Street Toast Shown Assemble Like a Pro


  • Lay one slice of bread on a plate. Stack on your omelet.
  • Add a slice of ham and cheese. The cheese will melt from the heat of the omelet—yum!
  • Here’s the fun part: Sprinkle a small pinch of sugar right on top. It sounds strange, but that sugar is what gives Korean street toast its signature sweet-savory flavor!
  • Drizzle with ketchup and a zigzag of mayonnaise for that authentic look.
  • Top with the second slice of bread, press down gently, and cut in half.

Tips for Perfect Street Toast Every Time

  • Use fresh veggies: Fresh cabbage and carrots give the best crunch.
  • Keep it hot: As soon as the omelet is ready, stack your sandwich so the cheese melts perfectly.
  • Customize: Swap in what you have—add cooked bacon, turkey, or go all veggie with mushrooms.
  • Don’t skip the sugar: It feels odd, but just a pinch on the omelet layer is what sets this apart from any other breakfast sandwich.

Why Is Korean Street Toast So Popular?

Ever wondered why Koreans love this street toast so much? It’s budget-friendly, ultra-filling, and super portable. Perfect for busy mornings!

Imagine you’re running late for work. You stop by a food cart, grab a steamy, wrapped street toast, and devour it on your bus ride. 

It’s a taste of comfort that gets you ready for the day ahead. When you make it at home, you recreate a little piece of that experience—no commute required.

Popular Variations to Try

Korean street toast recipes are as unique as the people making them. Want to mix things up? Try some of these spins:

  • Spicy Street Toast: Add a squirt of Sriracha or gochujang for some heat.
  • Avocado & Egg: Mash ripe avocado on the toasted bread before adding the omelet.
  • Extra Protein: Swap ham for a sausage patty or a double layer of egg.
  • Vegan Version: Use vegan butter and cheese and load up with more veggies.

Final Thoughts: Give Korean Street Toast a Try!

If you’re bored of cereal or tired of plain toast, Korean street toast is a must-make. It brings new life to breakfast and is sure to surprise your family or friends. 

Even if you’ve never cooked with cabbage or added sugar to a sandwich before, now’s your chance to try something new.

So, next time you’re looking for a quick breakfast or brunch idea, why not reach for the frying pan and treat yourself to a little Korean magic? 

You might just make it a new Saturday morning tradition!

Looking for more Korean recipes?

Check out other easy Korean dishes like Kimchi Fried Rice or Bibimbap to go with your street toast. 

Have a favorite twist on the recipe? Share your ideas in the comments below—I’d love to hear how you made it your own!


Easy I Don't Know Salad Recipe: A Flavorful Crowd-Pleaser

Have you ever been put on the spot with the infamous question, "What’s for dinner?" only to draw a complete blank? Don’t worry. 

We’ve all been there. Sometimes, we stare into the fridge hoping for culinary inspiration but come up with…well, “I don’t know!”. That’s the beauty of today’s recipe. 

It’s called the “I Don’t Know” Salad for a reason—it’s easy, delicious, and totally customizable. Whether you’re whipping up a quick lunch or need a last-minute party dish, this salad is sure to satisfy everyone’s taste buds.

Why You’ll Love the "I Don’t Know" Salad


3  Different Salad Images depicting Easy I Don't Know Salad Recipe: A Flavorful Crowd-Pleaser

This salad recipe is the ultimate solution for those indecisive cooking moments. Not only is it quick and easy to put together, but it’s also a real crowd-pleaser

If you’re looking for ways to use up what’s in your pantry or fridge, this recipe has you covered. 

Plus, it requires only a handful of everyday ingredients. You don’t need any special skills to whip it up—and you might even have everything on hand right now!

  • Quick to make—less than 20 minutes from start to finish
  • Simple ingredients found in most pantries
  • Customizable with your favorite add-ins
  • Perfect for potlucks, picnics, or busy weeknights

What is the "I Don’t Know" Salad?

The “I Don’t Know” Salad isn’t your typical green salad. Instead, it combines pasta, vivid veggies, and tasty seasonings in a way that makes your taste buds sing. 

It’s flavorful, with a satisfying crunch and a savory kick in every bite. Think of it as a cross between a classic pasta salad and a zesty vegetable mix—impossible to resist!

Here’s where the name comes in: this dish was created for those moments when you really don’t know what to make for dinner. 

It’s forgiving, fun, and full of flavor. And the best part? There’s plenty of room for creativity.

Key Ingredients You Need


Salad with Shrimp shown as Key Ingredients You Need


You don’t need to run out to the store or break the bank to make this easy salad. Let’s break it down into the main components:

  • Pasta: The base of the salad. Rotini or fusilli works great because they hold the dressing well. But honestly, any short pasta will do.
  • Vegetables: Here’s your chance to use up anything lingering in your crisper. Tomatoes, celery, bell peppers, and green onions are all popular choices.
  • Protein: Chopped ham adds saltiness and makes this salad more filling. You can swap this out for chicken, turkey, or even tofu if you like.
  • Shredded Cheese: Cheddar is a classic but use what you love or what you have on hand.
  • Dressing: A simple mix of mayonnaise and Ranch gives this salad a creamy texture and irresistible flavor. Like it with a little tang? Add a splash of vinegar or a squeeze of lemon.
  • Seasoning: Salt, pepper, and a pinch of garlic powder bring everything to life.

Hint: Don’t be shy about adding your own twist. Olives, corn, pickles, or even jalapeños bring their own tasty flair. The “I Don’t Know” Salad is all about flexibility!

How to Make the "I Don’t Know" Salad

Ready to whip this up? Grab a large bowl, your ingredients, and follow these simple steps:


Pasta shown as the 1st Step in How to Make the "I Don’t Know" Salad
                                                         
  1. Cook the pasta. Boil water and cook your favorite pasta according to package instructions. Drain and rinse with cold water to keep things cool and fresh.
  2. Chop your veggies and protein. Cut your tomatoes, celery, ham, and any other additions into small, bite-sized pieces.
  3. Mix it all together. Combine the cooked pasta, veggies, ham, and shredded cheese in a big bowl.
  4. Add the dressing. Spoon in mayonnaise and Ranch (about equal parts), then toss until everything is coated evenly.
  5. Season to taste. Sprinkle in salt, pepper, and garlic powder. Mix again, give it a quick taste, and adjust as needed.
  6. Chill if you have time. For the best texture and flavor, let the salad sit in the fridge for 30 minutes. But if you’re short on time, dive in right away!

Step 2 chopping veggies shown in How to Make the "I Don’t Know" Salad


Step 3:  Adding the dressing in How to Make the "I Don’t Know" Salad


Personal Touch: My Go-To Additions

I’ve made this salad countless times—especially during the summer when I want something quick and satisfying. My family loves when I add a handful of halved grapes for a burst of sweetness. 

Sometimes, I’ll toss in a scoop of sweet corn or even swap out the ham for leftover rotisserie chicken. The possibilities really are endless.

Do you have a favorite salad add-in? Next time you make this dish, try tossing in your own extras and see how much you can mix it up!


A salad with pasta shown to depict adding Personal Touch: My Go-To Additions

Serving Suggestions

The “I Don’t Know” Salad is just as perfect as a main dish as it is a side. Here are a few fun ways to make it the center of your meal:

  • Pair with grilled meats like chicken, steak, or burgers for an easy cookout menu.
  • Serve as a light lunch with crusty bread and a bowl of fresh fruit.
  • Bring it to picnics and potlucks—it travels well and everyone loves it.
  • Use it as a “clean out the fridge” dinner when you want to minimize food waste.

And if you happen to have leftovers, the flavors only get better overnight. Just give it a quick stir before serving since the dressing can settle at the bottom.

Tips for Making the Best "I Don’t Know" Salad

  • Don’t overcook the pasta—you want it firm enough to hold up to the dressing.
  • Go easy on the salt if you’re using salty meats or cheeses—taste before you add extra.
  • Chill the salad for at least 30 minutes if you can. It helps meld the flavors.
  • Keep it colorful. The more veggies, the brighter and more appealing your salad will be!

Why It’s Perfect for Every Occasion

This easy pasta salad is truly a lifesaver when time is short, or company shows up unannounced. It’s budget-friendly, hearty, and fits just about any occasion. Whether it’s a weekday dinner or a big family gathering, you can count on it to disappear fast! 

Need a vegetarian version? Simply skip the ham or swap in chickpeas for protein.

Think of the “I Don’t Know” Salad as your culinary wildcard—the recipe that always works, no matter what you have to work with.

Ready to Try This Easy Salad Recipe?

If you find yourself pondering what to make for dinner tonight, reach for this easy salad recipe. You won’t be disappointed. 

With endless ways to customize and a flavor that makes everyone happy, you'll wonder why you ever stressed about dinner in the first place.

What creative add-ins will you try in your own version of the “I Don’t Know” Salad? Comment below and share your favorite twists—it might just inspire someone else’s next meal!


Thursday, May 22, 2025

How to Make a Stunning Brunch Pancake Board for Breakfast

Are you searching for a show-stopping breakfast idea that’s both easy and impressive? Look no further than the pancake board. This trendy breakfast platter is turning ordinary brunches into unforgettable experiences. 

If you’re hosting family for the holidays or just want a fun Sunday breakfast, a pancake board lets everyone pick their favorites and build their own perfect stack. 

Let’s dive into how you can create your own, step by step!

What is a Pancake Board?

Imagine your favorite charcuterie board, but instead of cheese and meats, it's piled high with fluffy pancakes and all sorts of delicious toppings. 

That’s a pancake board in a nutshell. It’s a creative and interactive way to serve breakfast or brunch, offering a variety of flavors, textures, and colors that are sure to delight guests of any age.


How to Make a Stunning Brunch Pancake Board for Breakfast


Why Make a Pancake Board?

Why stick to the same old breakfast routine when you can serve up a stunning, Instagram-worthy breakfast platter? A pancake board is:

  • Fun and interactive – Everyone builds their own plate, so even picky eaters are happy.
  • Customizable – Add something for everyone, from sweet to savory.
  • Great for groups – Perfect for holidays, birthdays, or casual get-togethers.
  • Visually stunning – The display alone will have everyone excited for breakfast!

As a mom who loves brunch parties, I’ve found pancake boards to be a real icebreaker. 

Guests love gathering around the board, choosing their favorites, and even showing off their pancake-stacking skills!

How to Make a Pancake Board: Step-by-Step

Ready to create your own breakfast showpiece? Here’s everything you need to know, from choosing your pancakes to selecting the best toppings and assembling a beautiful board.

Step 1: Choose Your Pancakes


A stack of pancakes with fruit and syrup to depict Choose Your Pancakes

Start with the stars of the show: the pancakes! You can use your favorite homemade pancake recipe or grab a box of mix for a quicker option. Want to go the extra mile? Offer a couple of varieties, such as:

  • Classic buttermilk pancakes
  • Mini silver dollar pancakes
  • Gluten-free pancakes
  • Chocolate chip pancakes
  • Blueberry pancakes

Mini pancakes are especially fun for kids and make it easier for guests to stack, mix, and match.

Step 2: Pick Your Toppings


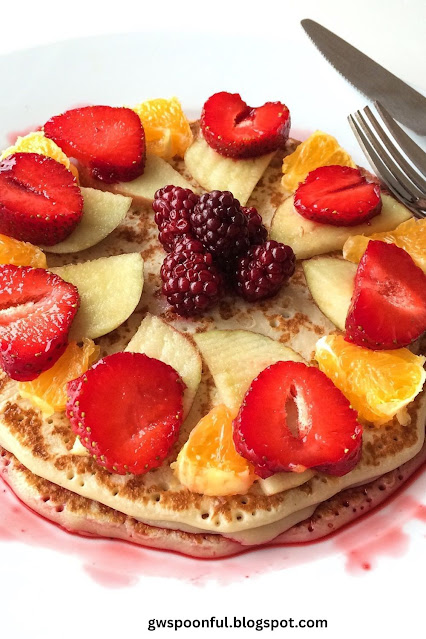
A stack of pancakes with fruit on top to depict Pick Your Toppings

Here’s where you can really get creative! Think about the flavors and colors you want on your pancake breakfast board

Aim for a mix of fresh fruit, crunchy add-ons, spreads, and, of course, syrups. Some tasty pancake board toppings include:

  • Fresh berries (strawberries, blueberries, raspberries)
  • Sliced bananas
  • Chopped apples or pears
  • Whipped cream
  • Nutella or chocolate spread
  • Maple syrup and other flavored syrups
  • Chopped nuts (walnuts, pecans, almonds)
  • Peanut butter or almond butter
  • Yogurt
  • Butter pads
  • Mini chocolate chips or sprinkles
  • Crispy bacon or breakfast sausage (for a savory touch)

Do you love the salty-sweet combo? Adding bacon or sausage to your brunch board is a game-changer—trust me, your guests will thank you!

Step 3: Gather Your Tools

To assemble your pancake board, you’ll need a large serving platter, wooden board, or even a clean baking sheet. 

Don’t forget small bowls and spoons for wet or sticky toppings like syrup, jam, or spreads.

Step 4: Arrange Your Pancake Board

Now comes the fun part—assembling your board! Here are some handy tips to make your board look gorgeous and appetizing:

  • Start in the center. Place a stack of pancakes (or two) in the middle of your board.
  • Build outwards. Surround them with piles of fruit, bowls of syrup, and other toppings.
  • Think in color. Alternate bright fruits with neutral spreads for a visually appealing look.
  • Use small bowls. Put sticky or runny toppings in bowls to avoid messes on the board.
  • Add variety. Mix shapes, sizes, and heights to keep things interesting.

Arranging a board is a little like decorating a cake—it’s all about layering and balance. Don’t worry about perfection. Sometimes, a little mess adds to the charm!

Step 5: Serve and Enjoy

Your pancake board is ready to wow your guests. Set out plates, forks, and napkins, and let everyone dig in. 

Don’t be surprised if you see people snapping photos before they pile their plates.

Pancake Board Tips for Success


3 Images of Pancakes with different toppings for Pancake Board Tips for Success


  • Keep pancakes warm: Store cooked pancakes in a 200°F (93°C) oven while you prep everything else. Cover them with foil to keep them soft and moist.
  • Prep ahead: Cut up fruit, pour syrup into bowls, and set out toppings in advance—making your morning stress-free.
  • Offer gluten-free or vegan options: If you have guests with dietary restrictions, consider pancakes that suit their needs.
  • Get the kids involved: Little hands can help set up toppings or arrange fruit for a fun family activity.

Wrapping Up and Next Steps

Making a pancake board for brunch is a simple way to turn breakfast into a party. Plus, it’s more affordable than brunch at a restaurant, and you control every ingredient that goes on the table.

Next time you want to impress overnight guests or treat your family to something special, give a pancake board a try. 

Play around with different flavors, toppings, and even themes—think autumn apple cinnamon or tropical coconut pineapple. The ideas are endless!

Ready to Make Your Own Pancake Board?

Why not gather your favorite pancake ingredients this weekend and get creative? If you do, share your creations and ideas in the comments below! 

Have you tried a pancake board before? What are your must-have toppings?  A stunning pancake board turns an ordinary breakfast into an experience. 

So, grab your spatula, gather your family, and start flipping—delicious memories await!


How to Make Strawberry Pavlova: A Simple Step-by-Step Guide

If you've ever wanted to wow your family or guests with a show-stopping dessert, strawberry pavlova is a wonderful place to start.  Thi...